WebP Image Format on Android
Learn what WebP image format is, why it’s a good candidate to use on Android, and how it can help you optimize your app size.
Drawables are often a major cause of increased app size. We’ll look at how to optimize images by migrating to the WebP image format.
WebP is officially recommended by Google as a strategy for reducing app size.
In this post, we cover what WebP format is, why we should use it on Android, how we can convert images, what to watch out for, how well-known companies leverage it to reduce their app size, and how it affects performance.
Overview of image formats on Android
Historically, Android apps used JPEG and PNG formats for icons, image assets, and other drawables. The standard practice was to generate files with different resolutions for the same asset and place them in appropriate density folders like drawable-xxxhdpi, drawable-xxhdpi and so on.
Later, Android 5.0 (API level 21) brought support for VectorDrawable, which is vector graphics defined in an XML file. It can be scaled without loss of display quality, which means the same file is losslessly resized for different screen densities. This results in a smaller app size, since there is no need to provide files of different resolutions.
With Compose, Android brought another way to define icons, which is through Kotlin code using ImageVector. Compose brings a set of pre-defined material icons that developers can leverage and avoid adding additional assets to their projects.
However, both VectorDrawable and ImageVector can mostly be used for icons or simple illustrations, since there are limitations to what can be achieved by just using points, lines, and curves.
We mostly still use PNG or JPG format for more complicated drawables, like photos or background images. They work well but bring increased app size. This is where WebP comes into play.
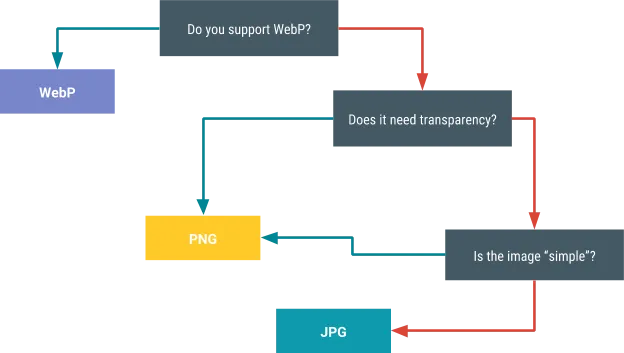 Deciding on a compression scheme (source)
What is WebP?
WebP is an image format developed by Google that provides better compression than JPEG and PNG. It supports both lossy and lossless compression, as well as transparency.
According to Google, usage of WebP results in, on average, 26% smaller files than PNG in the case of lossless compression. And 25–34% in case of lossy compression.
You can read more about how it works on the official page or Wikipedia.
WebP on Android
Lossy WebP images are supported in Android 4.0 (API level 14) and higher, and lossless and transparent WebP images are supported in Android 4.3 (API level 18) and newer.
You can convert existing BMP, JPG, PNG, or static GIF images to WebP format using Android Studio. To create lossless or transparent WebP images using Android Studio, your project must declare a **minSdkVersion** of 18 or higher.
Why should we use it?
The download size of an app is a critical metric for success, especially in developing countries. Having an app that requires users to download fewer megabytes is often an advantage compared to peers.
Drawables are often a major source of increased app size, as found by larger companies doing app size optimizations (Square, Grab). The learnings are that by changing from .png and .jpg format they were able to reduce their app size by a significant percentage.
In fact, it’s officially recommended by Google as a strategy to reducing app size.
This makes WebP a good image format to use on Android.
How to convert images to WebP?
Android Studio features a built-in converter tool for converting JPG, PNG, BMP, or static GIF images to the WebP image.
1) To convert an existing image, right-click on the file and select the “Convert to WebP” option. To convert multiple files, select all of them and then right-click on any of them.
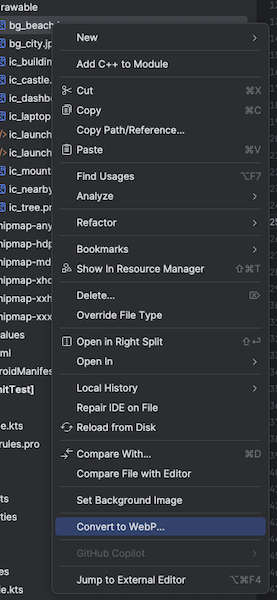 The action menu displays the “Convert to WebP” option
2) A new dialog will open where you can set the encoding type and quality. If you select lossy encoding, you can set the encoding quality. This setting is unavailable for lossless encoding as the quality will automatically be 100%. Check that the “Preview/inspect” checkbox is selected to compare the original and converted images. Press the OK button to proceed to the preview.
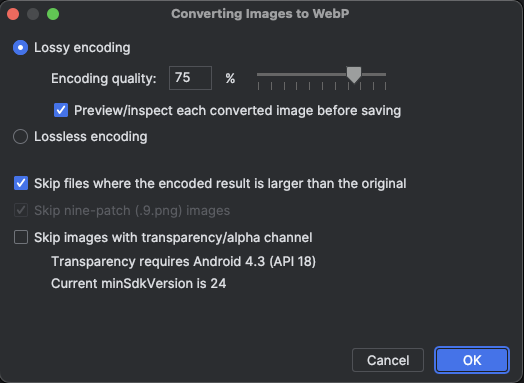 Settings dialog for converting images to WebP
3) In the next step, you can check the difference in image quality before confirming the conversion. On the left side is the original image (PNG, JPG, …), on the right is the converted WebP image, and in the middle is the difference or loss of quality. At the bottom, you can change the quality setting to a value that is acceptable to you. It also displays the original vs converted file size, so you know how much space you will save.
When converting multiple files, you are presented with this comparison dialog for every image. You can adjust the setting for each image or batch apply and confirm for all images.
Press Finish to convert the image.
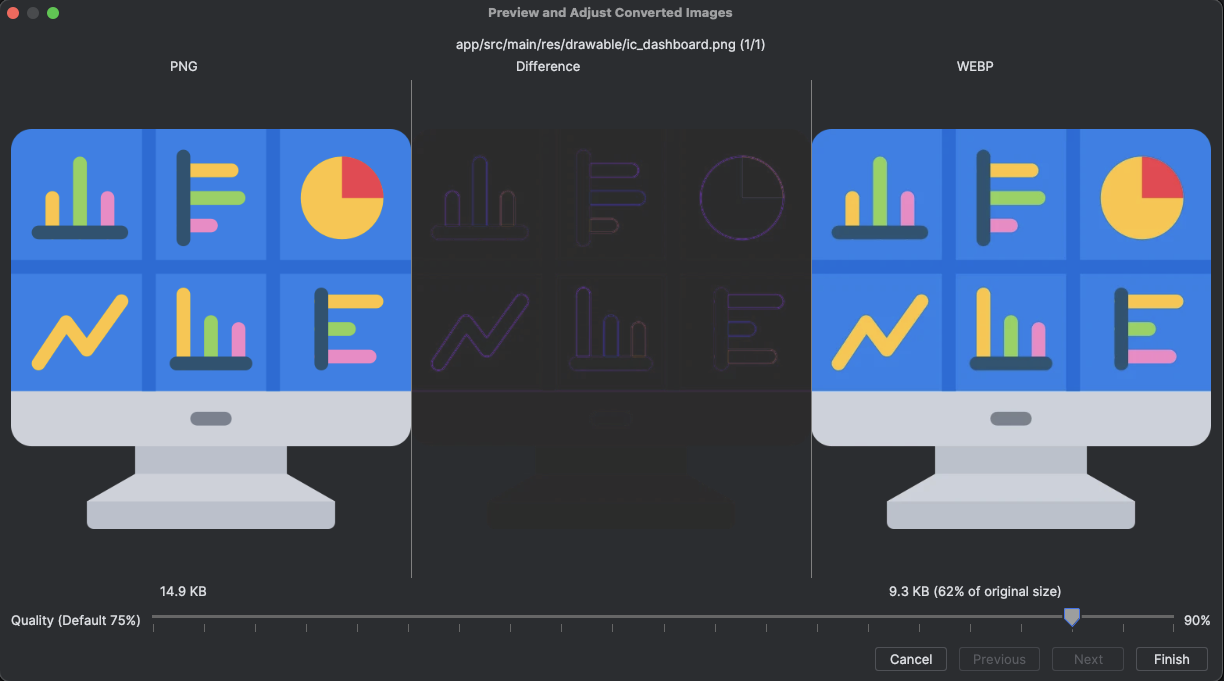 Preview dialog for comparing original and converted image
4) After an image is converted you will get an informational message on how much space you saved.
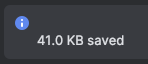 Informational message on the amount of saved space after conversion
5) That’s it! You don’t have to change anything in your code, assuming you are referencing the drawables by using the standard approach (R.drawable.image_name). If you are referencing them directly by filename, then you will have to change the extension from .png or .jpg to .webp.
What to watch out for?
1) PNG: When converting PNG images/icons, you can use the lossless (100% quality) setting in most cases. There is no loss in quality and the converted file is significantly smaller.
In the case of this sample PNG image, the converted file is smaller by 65% (22.0 KB vs 63.0 KB) without a loss in quality.
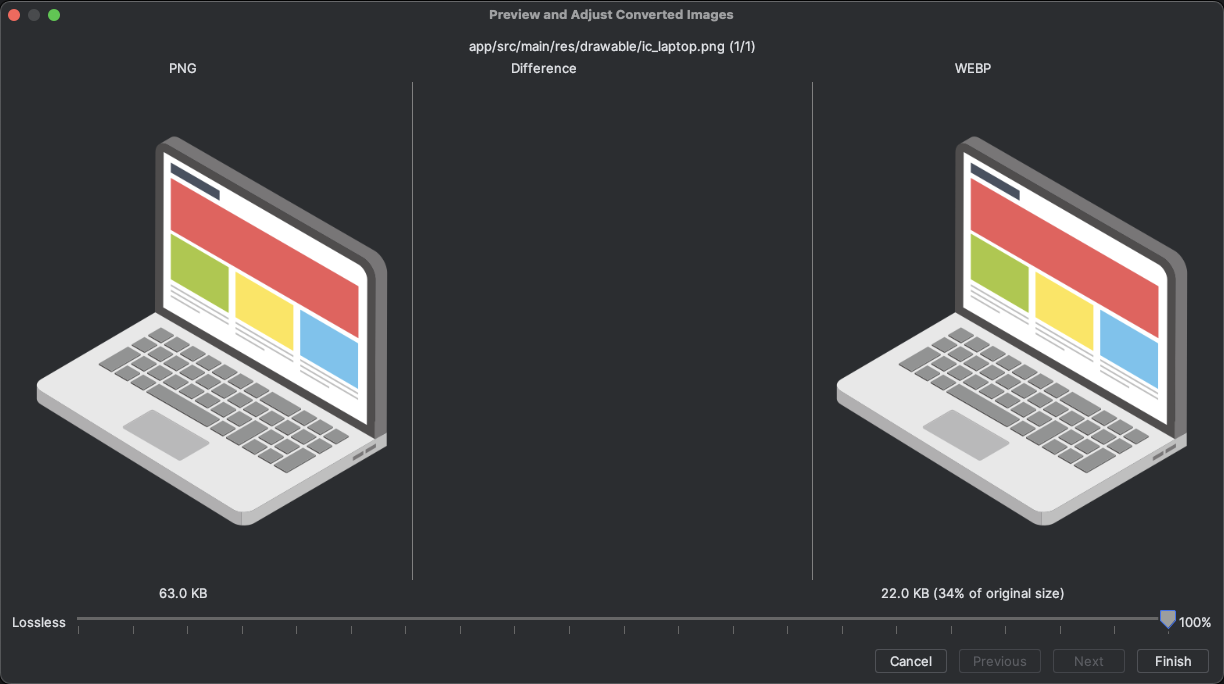 Converting a PNG image to WebP using lossless setting
2) Use case: The quality you select depends on your use case. If you use an image for a background on some screen, a lower quality setting is acceptable as it won’t be noticeable. Use a higher quality setting for images that are prominently displayed on the screen.
3) JPG: When converting JPG images, you have to find a balance between image quality and the converted file size. Using a higher image quality (80% or more) can sometimes result in a larger file than the original.
Example: the size of the converted sample image below is 736.5 KB vs 922.5 KB of the original at a setting of 75%. That is a 21% saving. At 60% quality, the file size is 627.5 KB (32% saving). However, using a setting of 85% results in a file with a size of 1.0MB, a 14% increase over the original. If quality is a priority, then it’s not worth converting this specific image.
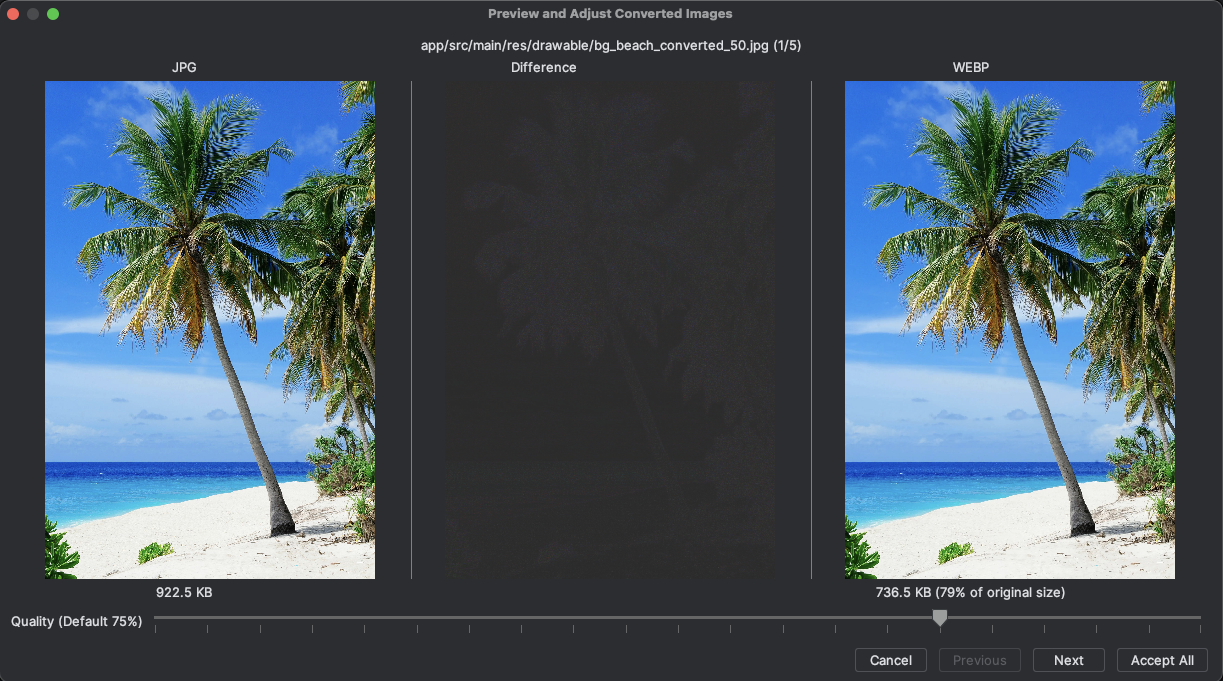 Converting a JPG image to WebP using lossy setting
You can skip converting images for which the converted file would be larger by checking the “Skip files where the encoded result is larger than the original” setting on the initial dialog (2nd step). This setting is enabled by default.
 Informational message when the image was not converted due to no net space saving
If you wish to see the differences in image quality and file sizes between JPG and WebP, consider checking out this sample app that I created: https://github.com/landomen/WebPSample
4) Orientation: Whatnot Engineering recently published a great deep-dive into how they faced issues with displaying WebP images in the correct orientation due to a bug in the ExifInterface. They submitted a fix to Google and it was merged, so this should be fixed in the latest AndroidX releases.
5) Vulnerability: Two vulnerabilities were discovered in September 2023 in the libwebp library. Attackers could craft a malicious .webp lossless file that could lead to an out-of-bounds/overflow condition in applications. This shouldn’t be an issue for most mobile apps that use static WebP images. However, if you plan to serve WebP images from the server and allow uploading WebP images from the device, consider having additional validity and security checks on the server.
Companies using WebP format to optimize app size
Numerous companies have shared their learnings from trying to reduce their app size. A key factor in most cases is compressing the images using a suitable format. Here are some examples of companies who converted their image assets to WebP to optimize their app sizes:
- Square: https://developer.squareup.com/blog/keeping-up-with-android-app-size-growth/
- Grab: https://engineering.grab.com/project-bonsai
- Yelp: https://engineeringblog.yelp.com/2016/05/yelp-android-app-went-on-a-diet.html
What about remote WebP images?
Android officially supports encoding and decoding of WebP format, so any image library should be able to display a WebP image from a URL. This includes Coil, Glide, and others.
You can check how to load WebP images in Compose using Coil and Glide here.
What about performance?
I’ve written a simple benchmark that loads an image 100 times and tracks the loading time. The image is loaded from the drawable folder in full resolution using Coil. The results are based on three sequential runs on the release build of the sample app.
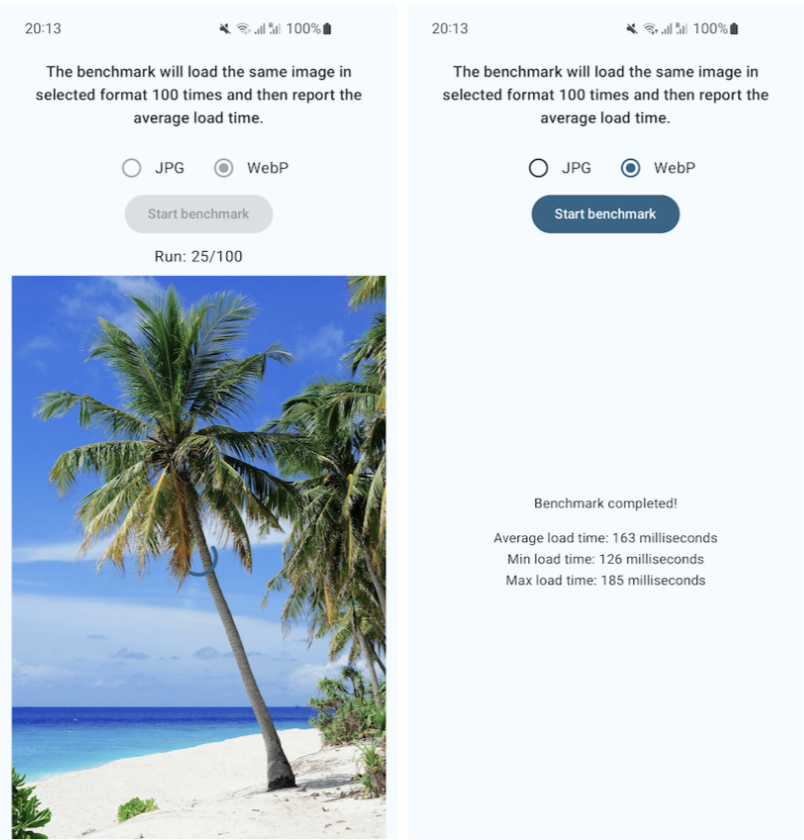 Benchmark screen for comparing load times between JPG and WebP
The JPG image used in the benchmark is the original 100% quality image, while the WebP image is the converted image with 80% quality.
1
2
3
4
5
6
7
8
9
10
11
12
13
14
Samsung S10 (Android 12):
| Load time (ms)   | JPG | WebP | Difference (%) |
|------------------|-----|------|----------------|
| Average          | 143 | 161  | +12%           |
| Min (Android 14) | 100 | 126  | +26%           |
| Max.             | 164 | 180  | +10%           |


Samsung S21 Ultra (Android 14):
| Load time (ms)   | JPG | WebP | Difference (%) |
|------------------|-----|------|----------------|
| Average          | 75  | 91   | +21%           |
| Min (Android 14) | 67  | 82   | +22%           |
| Max.             | 96  | 113  | +18%           |
We can see that it takes anywhere from 12–21% longer to load a WebP image than it does a JPG image. The differences are measured in milliseconds, making them unnoticeable to the users. Of course, the difference depends on the image quality you select for the converted image. We tested with 80%, using a lower quality will result in a faster load and smaller size.
Memory consumption is similar in both cases.
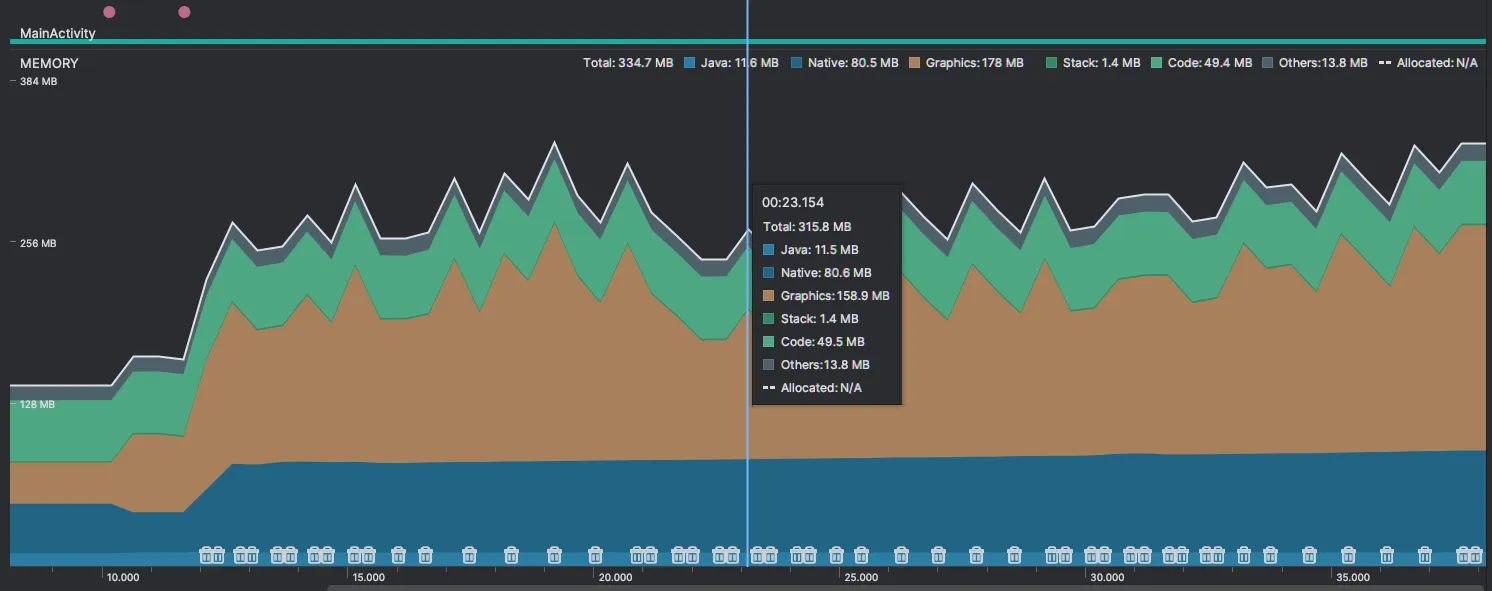 JPG memory consumption
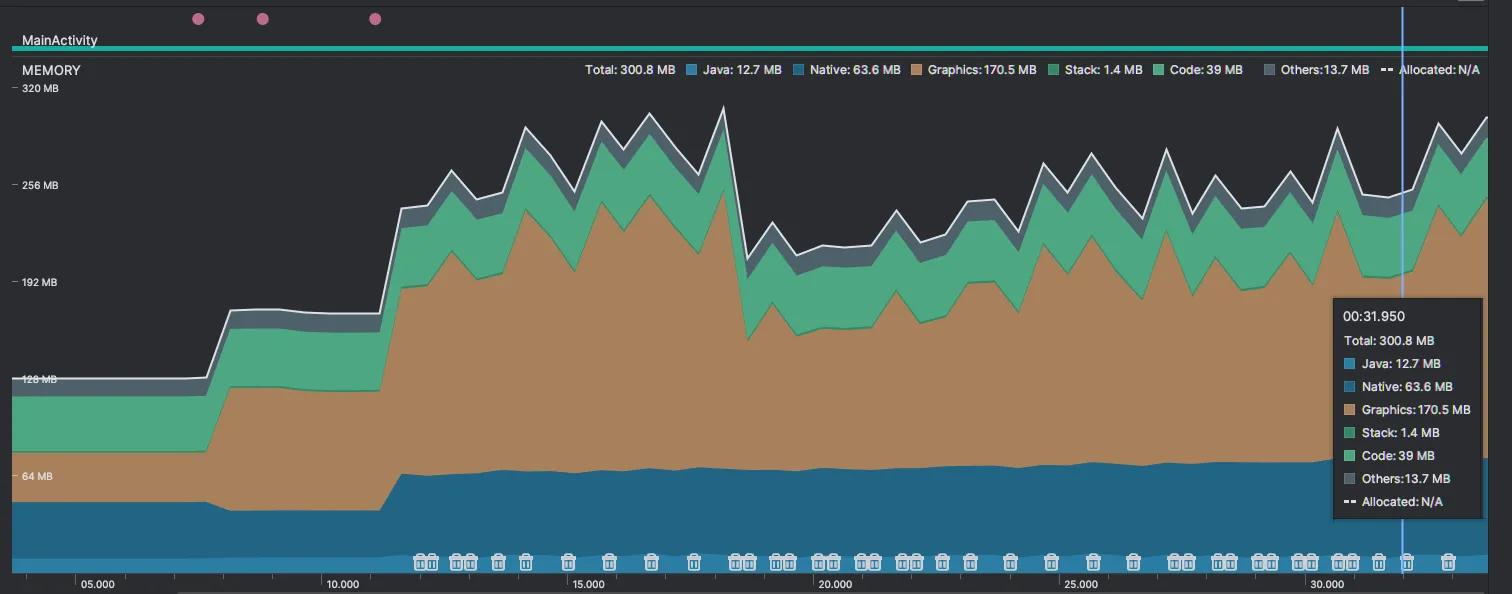 WebP memory consumption
Based on the results, the difference in performance is quite small and shouldn’t play a factor in migrating to the WebP format for most apps.
Conclusion
WebP is a modern image file format offering better compression than JPEG and JPG. That makes it a perfect candidate to use in Android apps where the download size of an app is a critical metric for success, especially in developing countries.
It’s fully supported by the Android system since API level 18 and Android Studio offers an in-built easy-to-use converter tool.
While the format offers a great way to reduce file sizes, the drawback is that the converted images can look slightly lower quality, depending on the compression setting, and that load times are slightly longer. So it’s important to test different quality settings to match your use case.
I hope you found this useful and will consider converting your image assets to WebP to optimize your app size. And if you already use WebP in your apps, feel free to share your learnings in the comments.
References:
- https://developer.android.com/studio/write/convert-webp — how to convert images to WebP
- https://developer.android.com/topic/performance/reduce-apk-size#use-webp — official recommendation to reduce app size by using the WebP format
- https://developer.android.com/develop/ui/views/graphics/reduce-image-sizes — official suggestions on how to reduce image download size