5 Useful Version Control Features in Android Studio
Android Studio comes packaged with a powerful Git GUI that can do everything a standalone Git GUI can and more.
Android Studio comes packaged with powerful version control features that can do everything a standalone Git GUI can and more. We’re going to take a closer look at a few of them that can increase your productivity. Even if you prefer using git via terminal commands, you might find some of these useful.
1. Shelving and Unshelving
Shelving is temporarily storing pending changes you have not committed yet. This is useful, for example, if you need to switch to another task, and you want to set your changes aside to work on them later.
Git has a similar concept called stashing; however, shelving is a feature of the IDE and is not related to Git. That means that if your Android Studio installation gets corrupted, all the shelved changes could be lost.
Creating a shelf
To create a shelf, select the changes in the commit tab that you want to shelve, right-click, and select “Shelve changes”. Enter a message to identify this specific shelf and confirm. The new shelf will appear under the “Shelf” tab.
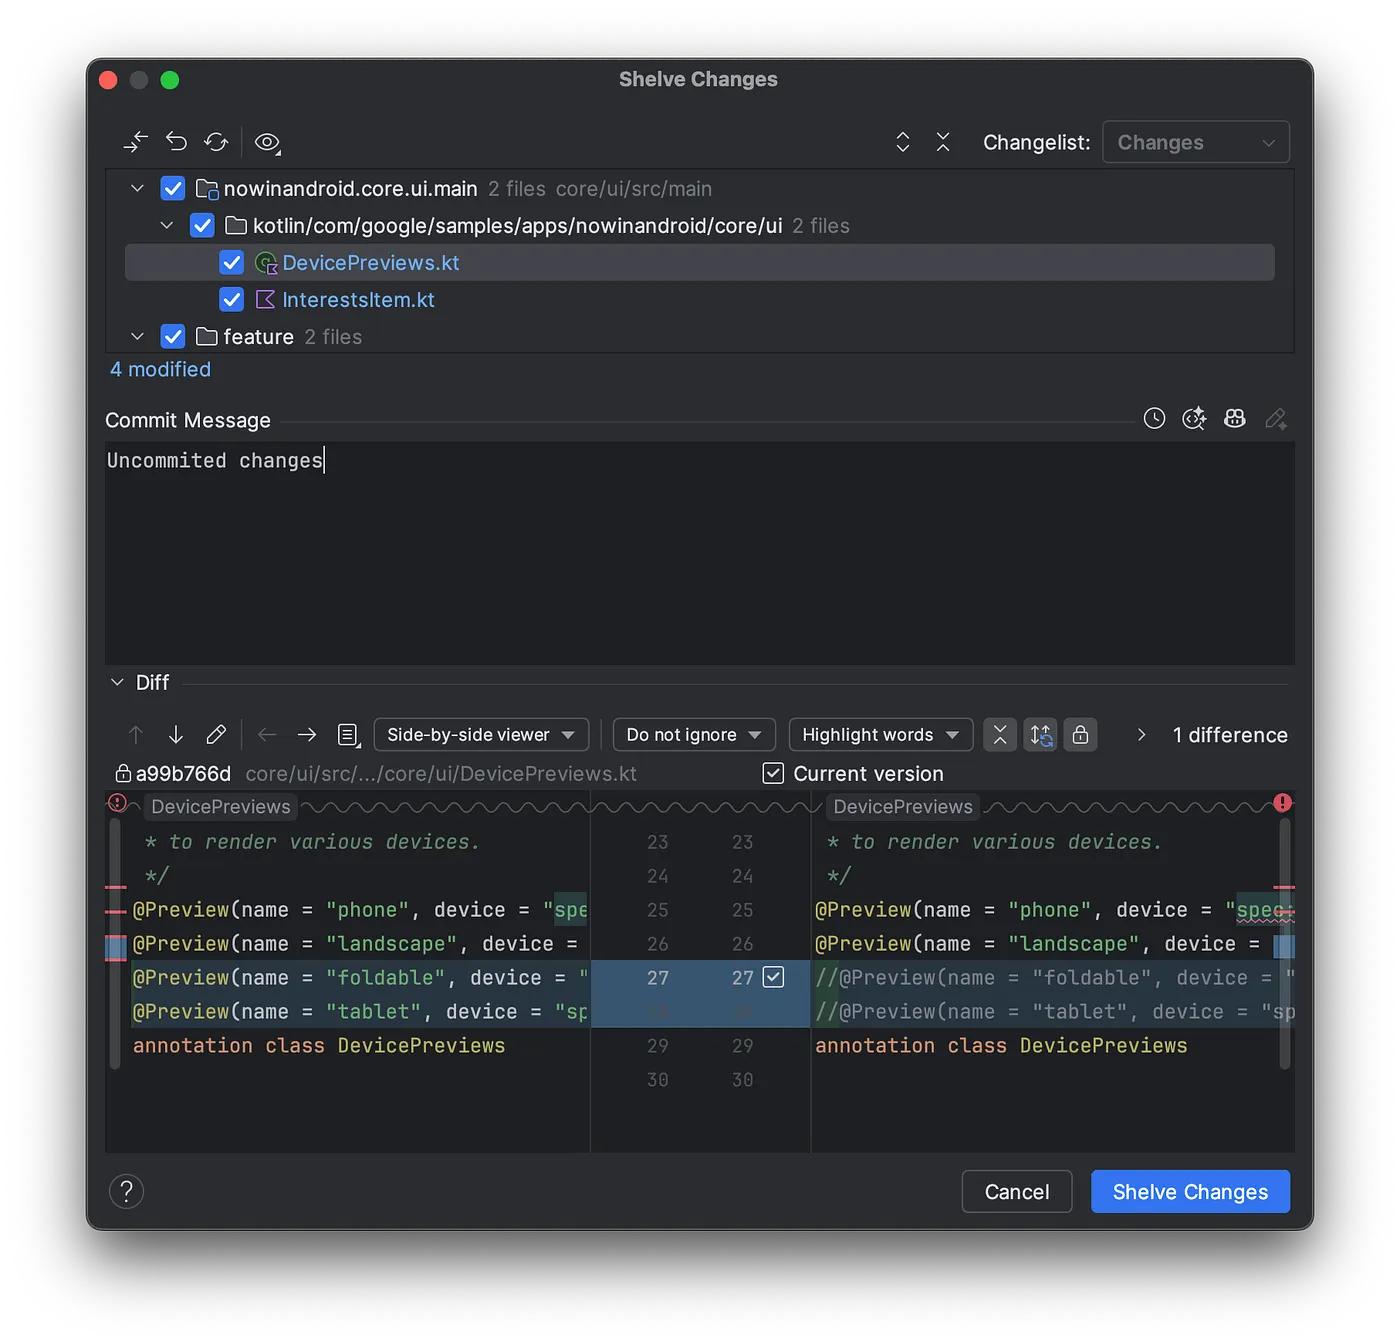 Creating a shelve.
Applying a shelf
To apply a shelf, go to the “Shelf” tab inside the “Commit” tab, right-click on the shelf, and select “Unshelve”. This moves all the changes back to the changelog.
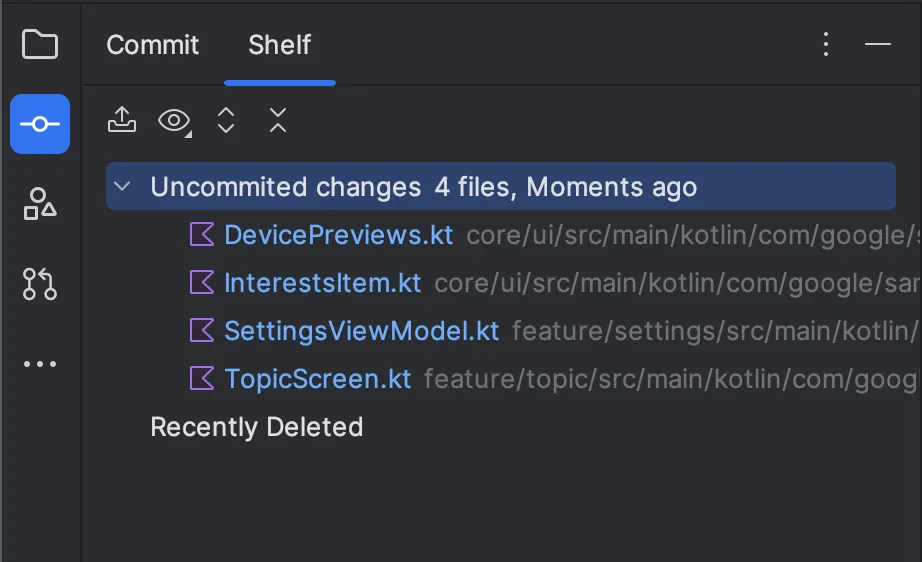 The shelf tab in the commit tab.
2. Patches
Git patches are text files that contain code and commit metadata. Creating a patch is similar to copying and packaging up your work to send to someone else. Applying a patch involves taking someone’s work and adding it to our local changes.
This can be useful for creating test scenarios during code reviews or for sharing changes across branches.
Creating a Patch File
To create a patch, we select files in the Commit tab, right-click, and select “Create Patch from Local Changes”. A new window will open where we can select the exact changes and the message.
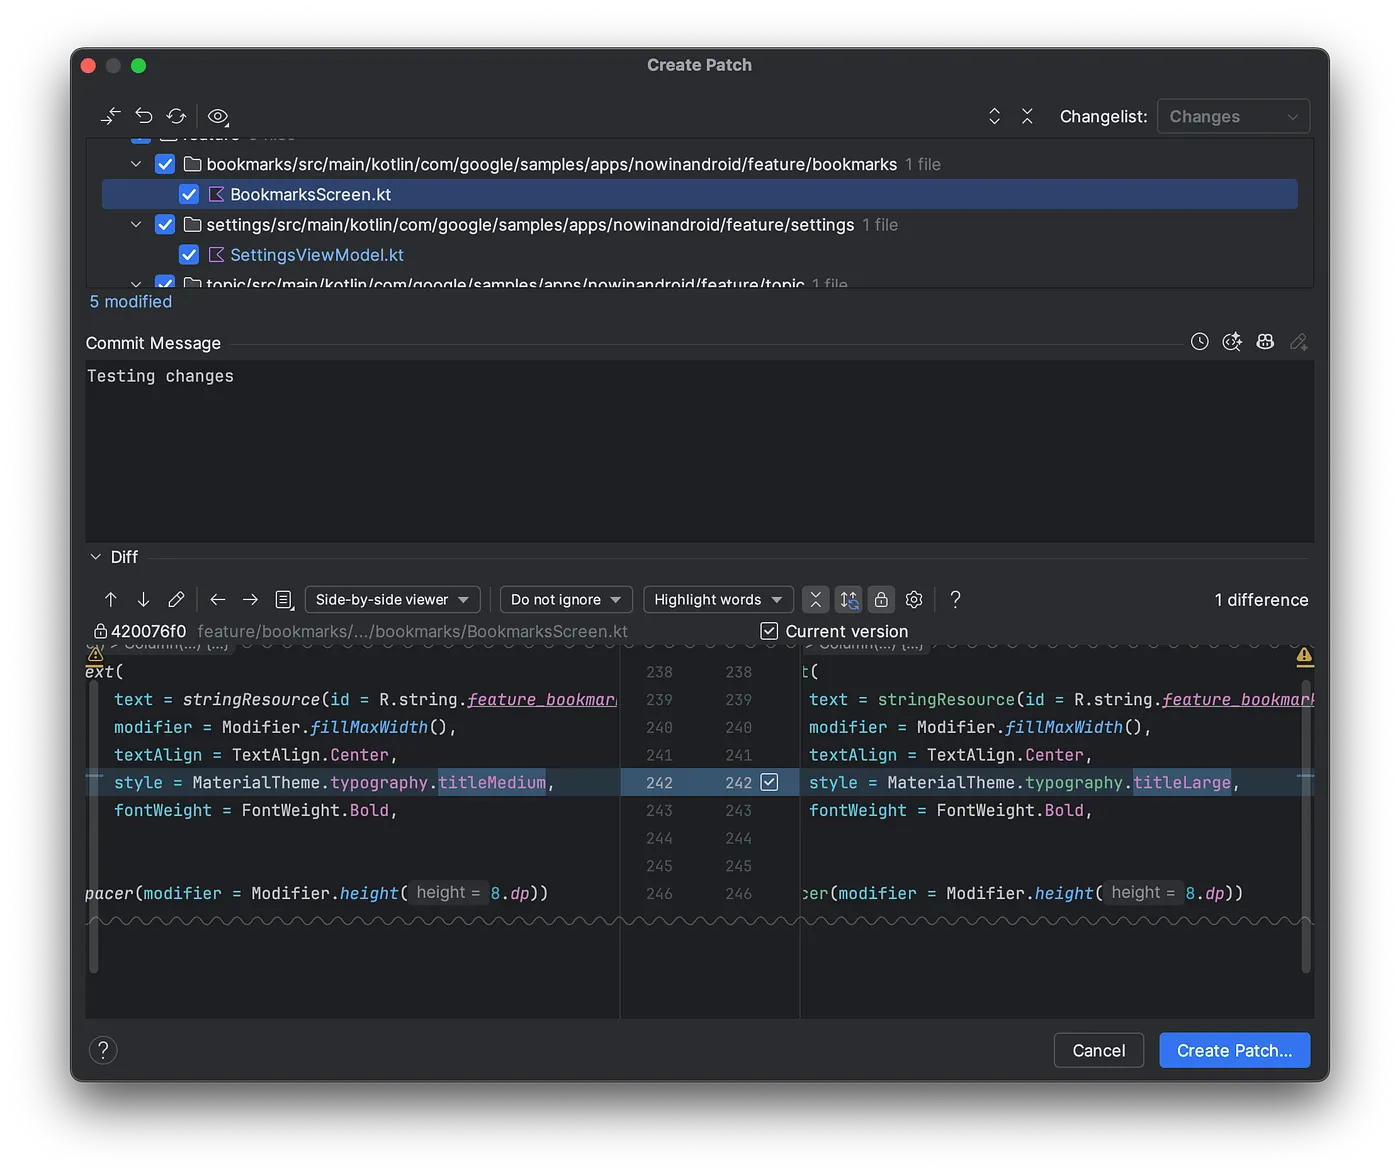 Creating a patch file from local changes.
Next, we click “Create Patch…”, confirm the output file location, and generate a patch file. The file should look something like this:
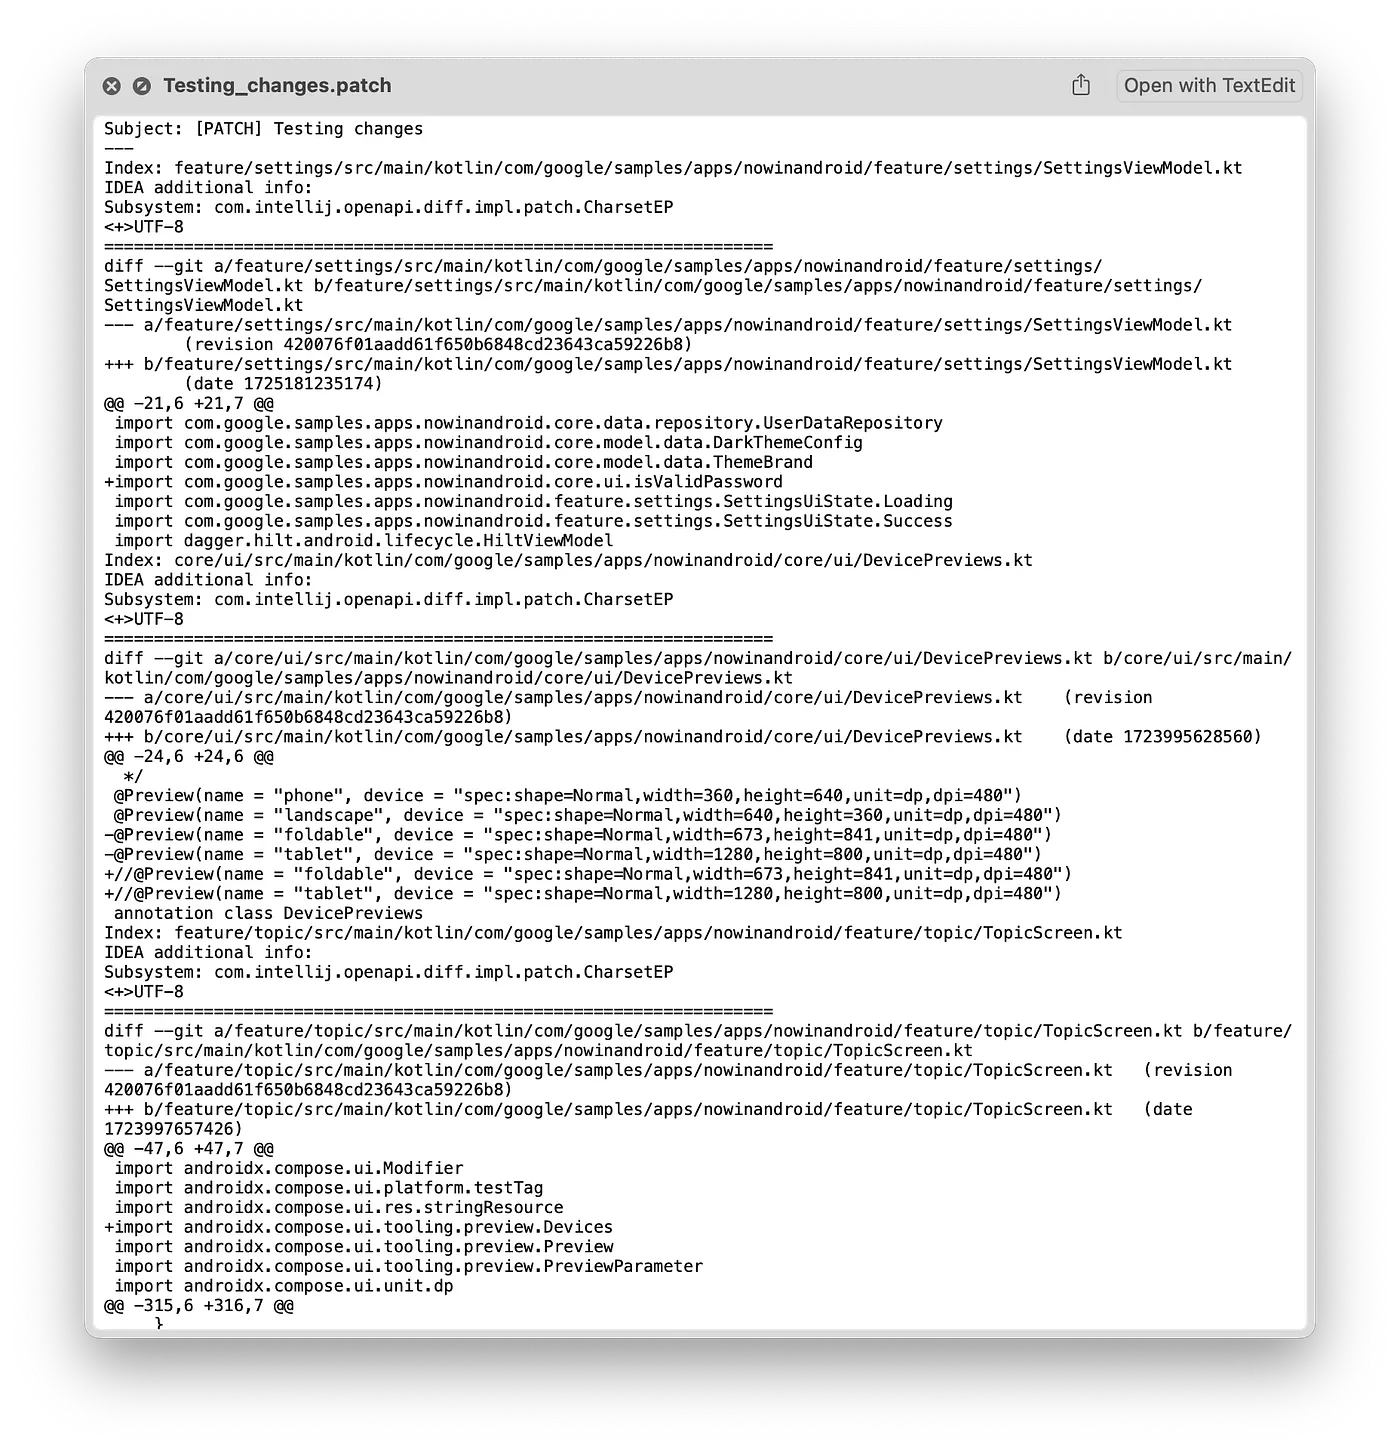 Sample of a generated patch file.
Copying as Patch
If we need to copy and paste the patch, we can use the “Copy as Patch to Clipboard” option to avoid additional steps.
Importing a Patch File
To import a Patch file, we go to the Git -> Patch -> “Apply Patch” or “Apply Patch from Clipboard”. This will open a window where we can select the changes to apply.
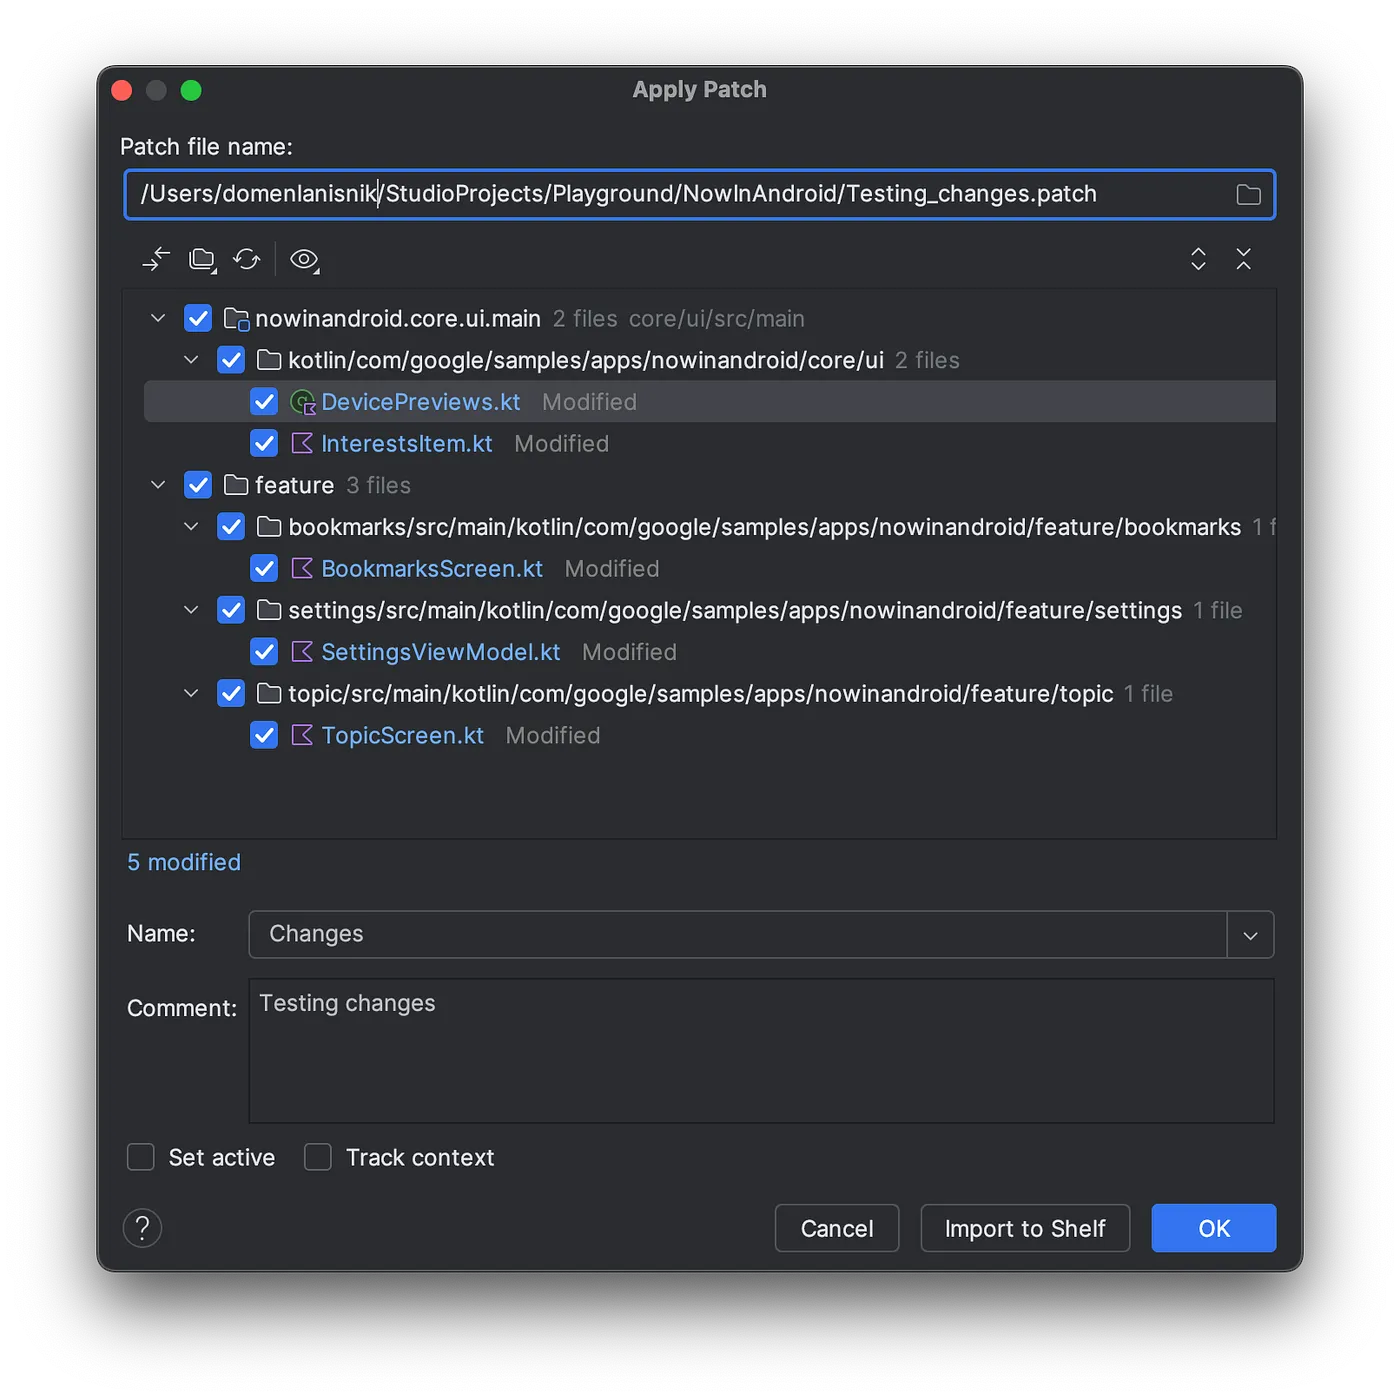 Applying changes from a patch file.
3. Merge Conflict Resolution
Android Studio offers a powerful merge conflict resolution feature. It will open each conflicting file in a new window with three sections.
The left section shows the state of the file from the current branch we have checked out. The right one shows the state of the file from the other branch, and the center section shows the final result.
You then resolve conflicts by clicking the arrow buttons next to each conflicting line.
It even offers a wizard to automatically resolve the non-conflicting changes, like new lines being added.
You can even edit the final result right there.
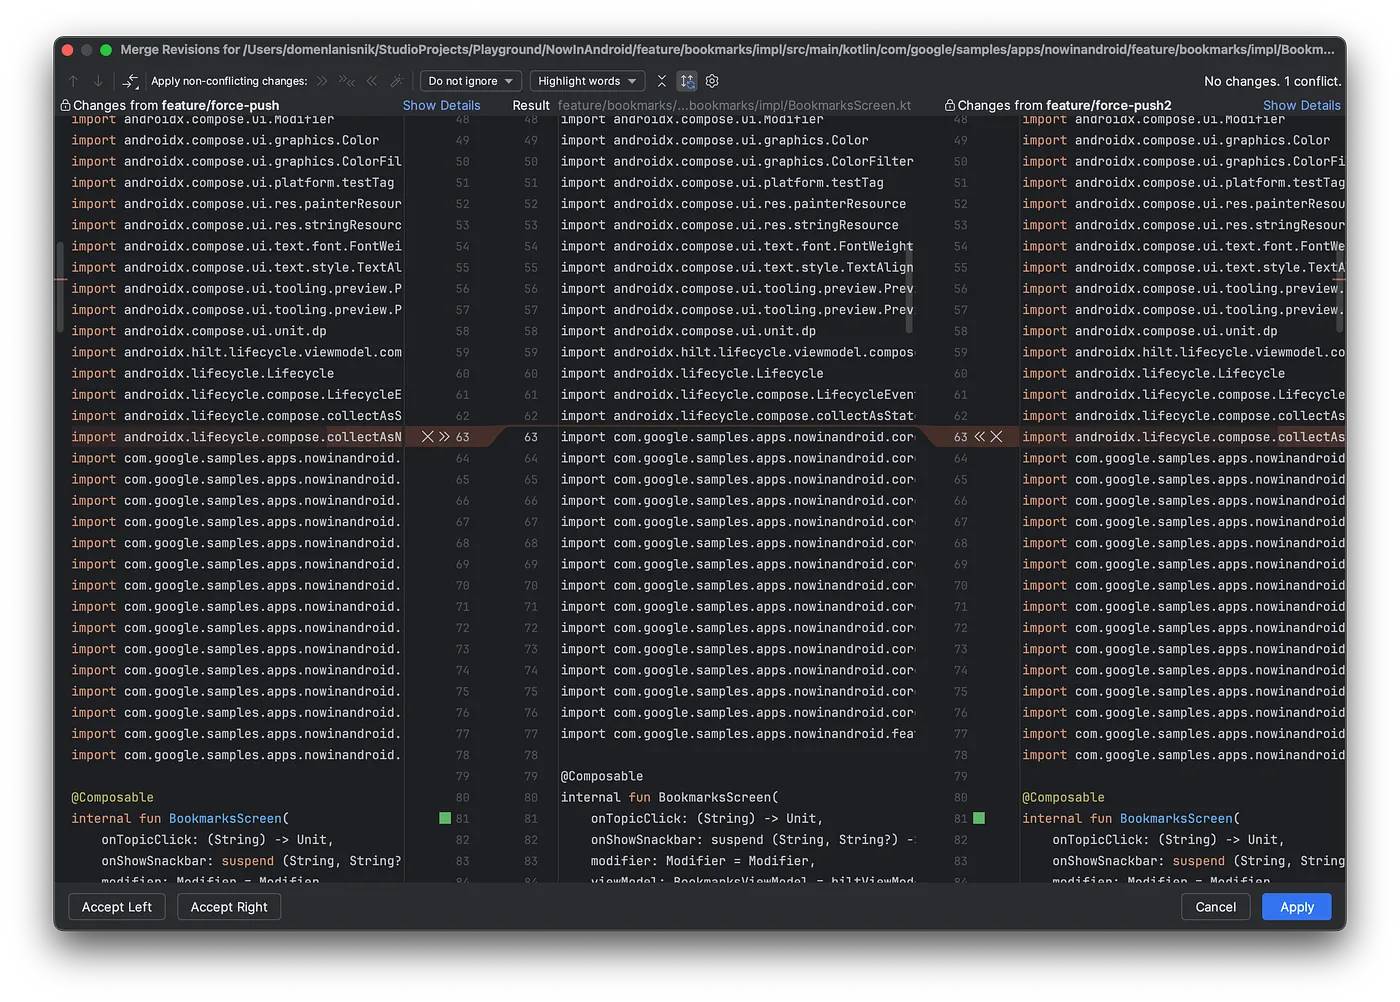 Merge conflict resolution window.
See https://www.jetbrains.com/help/idea/resolve-conflicts.html for more details on how to use the merge conflict resolution window.
4. Seeing history for specific files or lines of code
Android Studio offers several ways to see what changes were made to a specific file or line, and who made the change.
This can be useful when fixing bugs to find the owner of a specific change or to see the previous state before the bug was introduced.
Annotate lines
We can annotate every line of a file with the username of the person who last modified that line. To do that, right-click anywhere in a file, select Git, and then “Annotate with Git blame”.
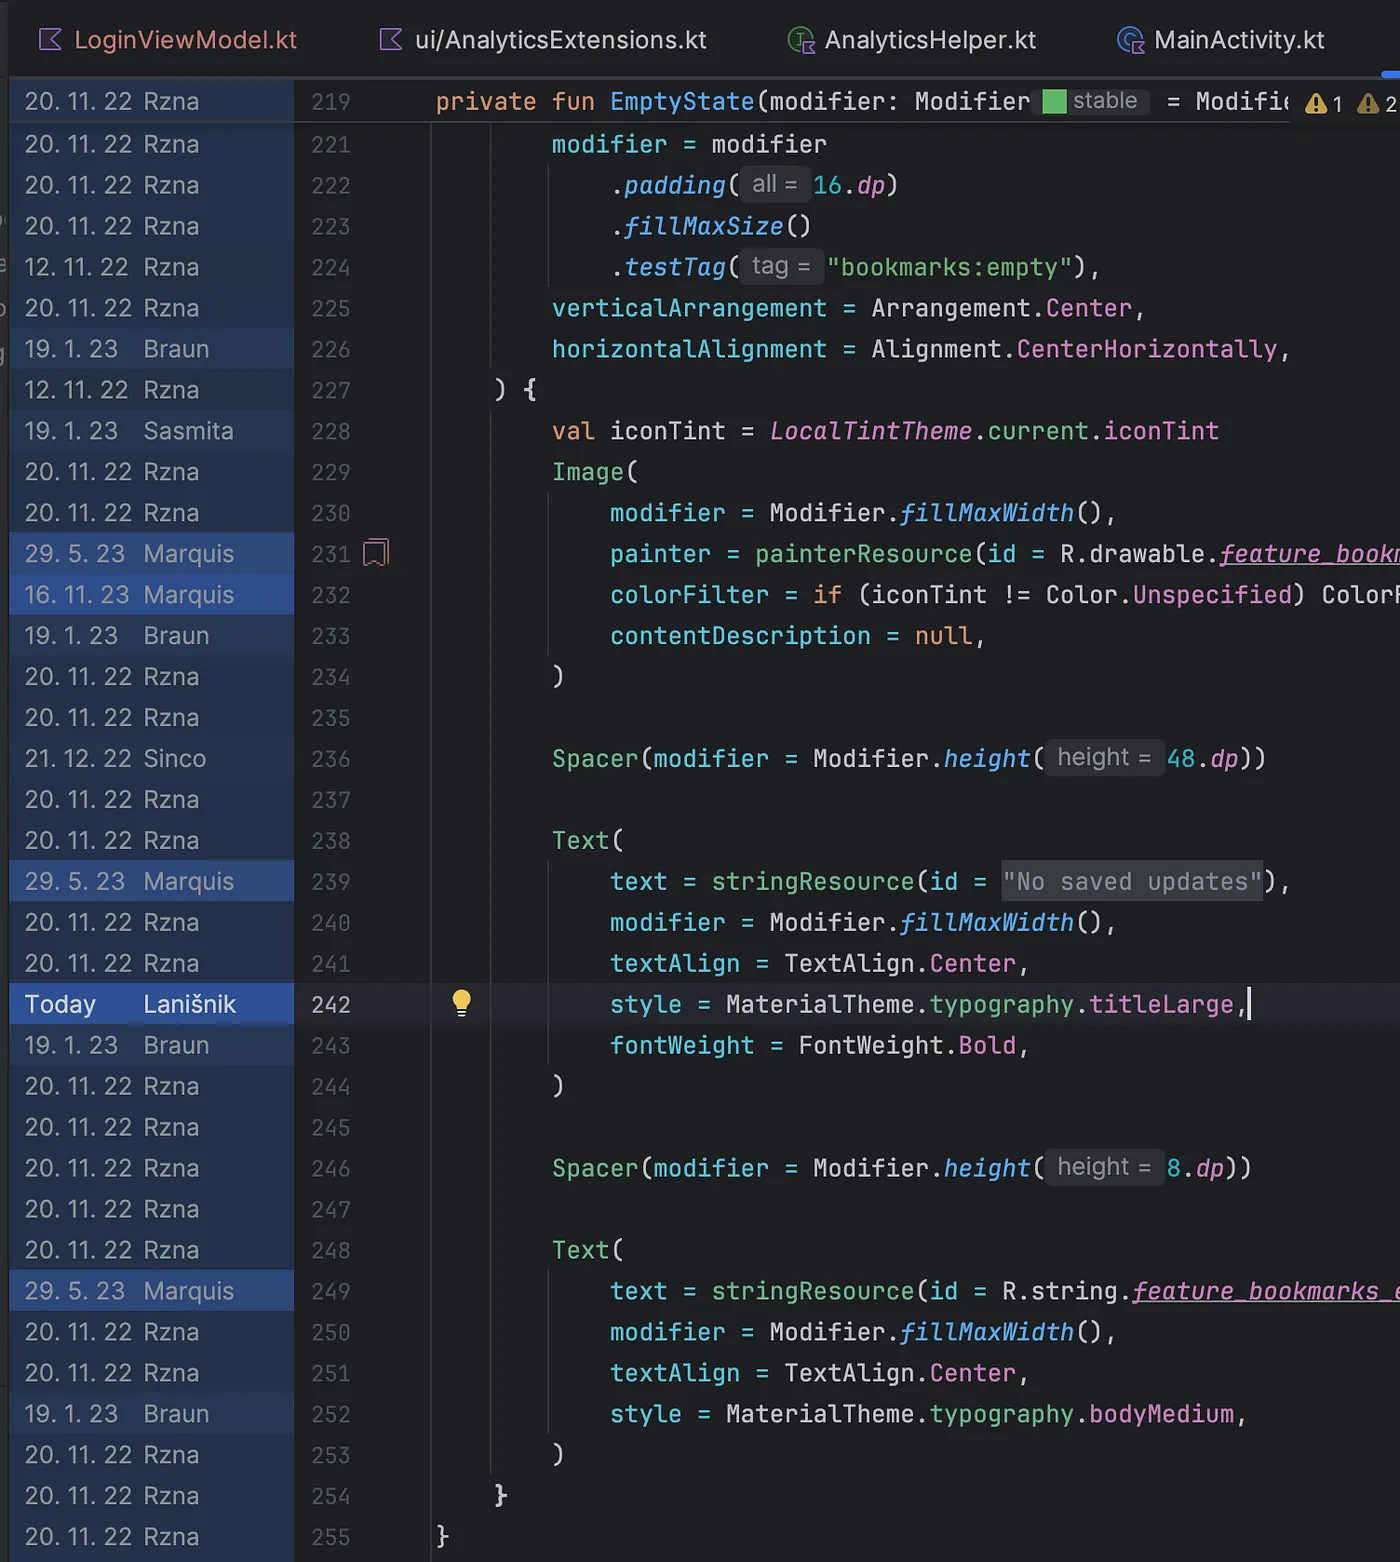 Annotated lines of a file.
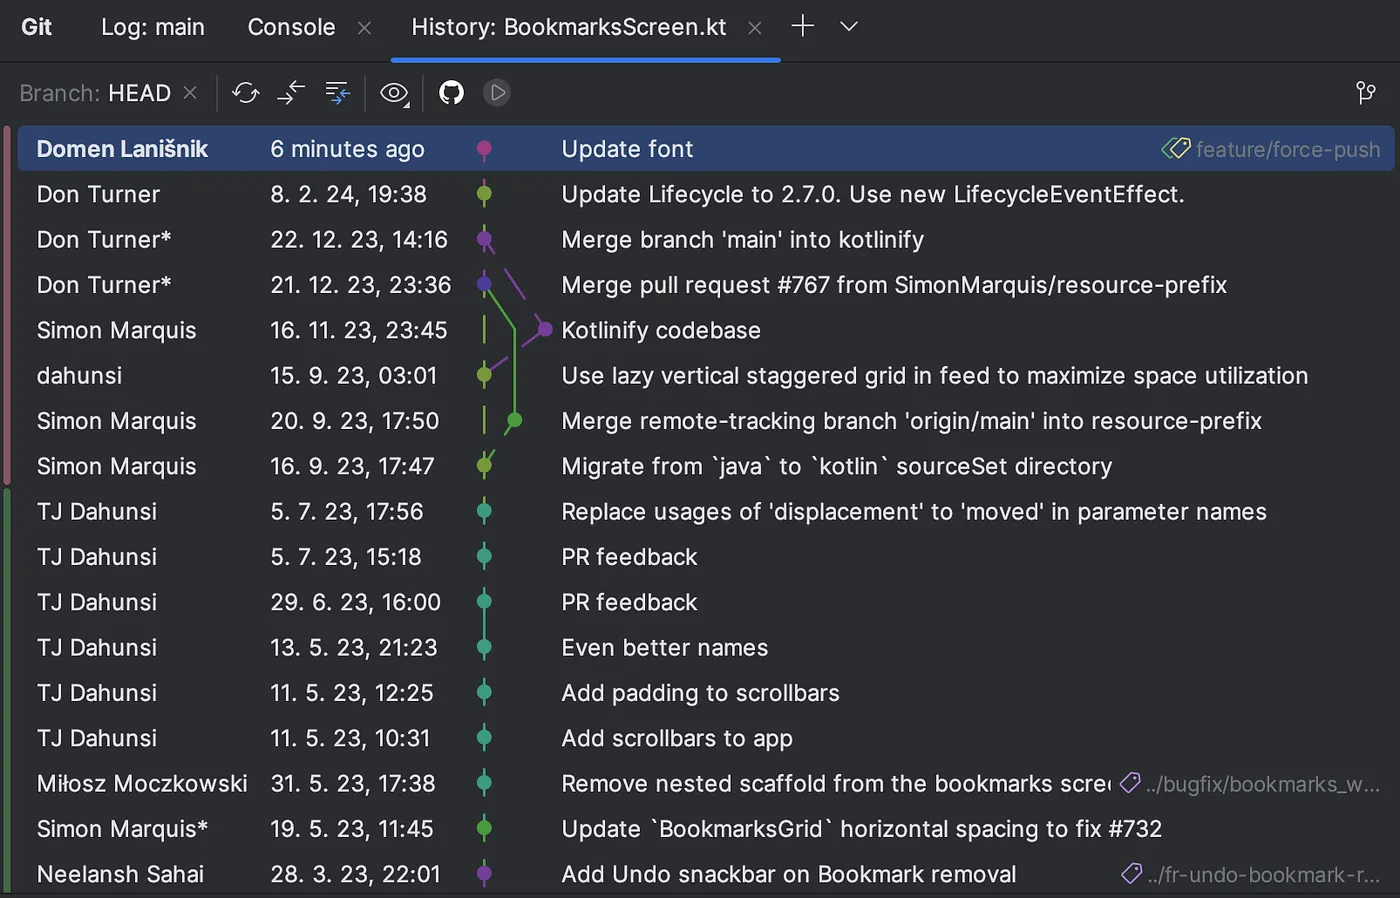
View history for selection
To see history for a specific selection, select the code you’re interested in, right click, select Git, and then “Show history for selection”. A new window will open showing all the commits that modified that specific selection.
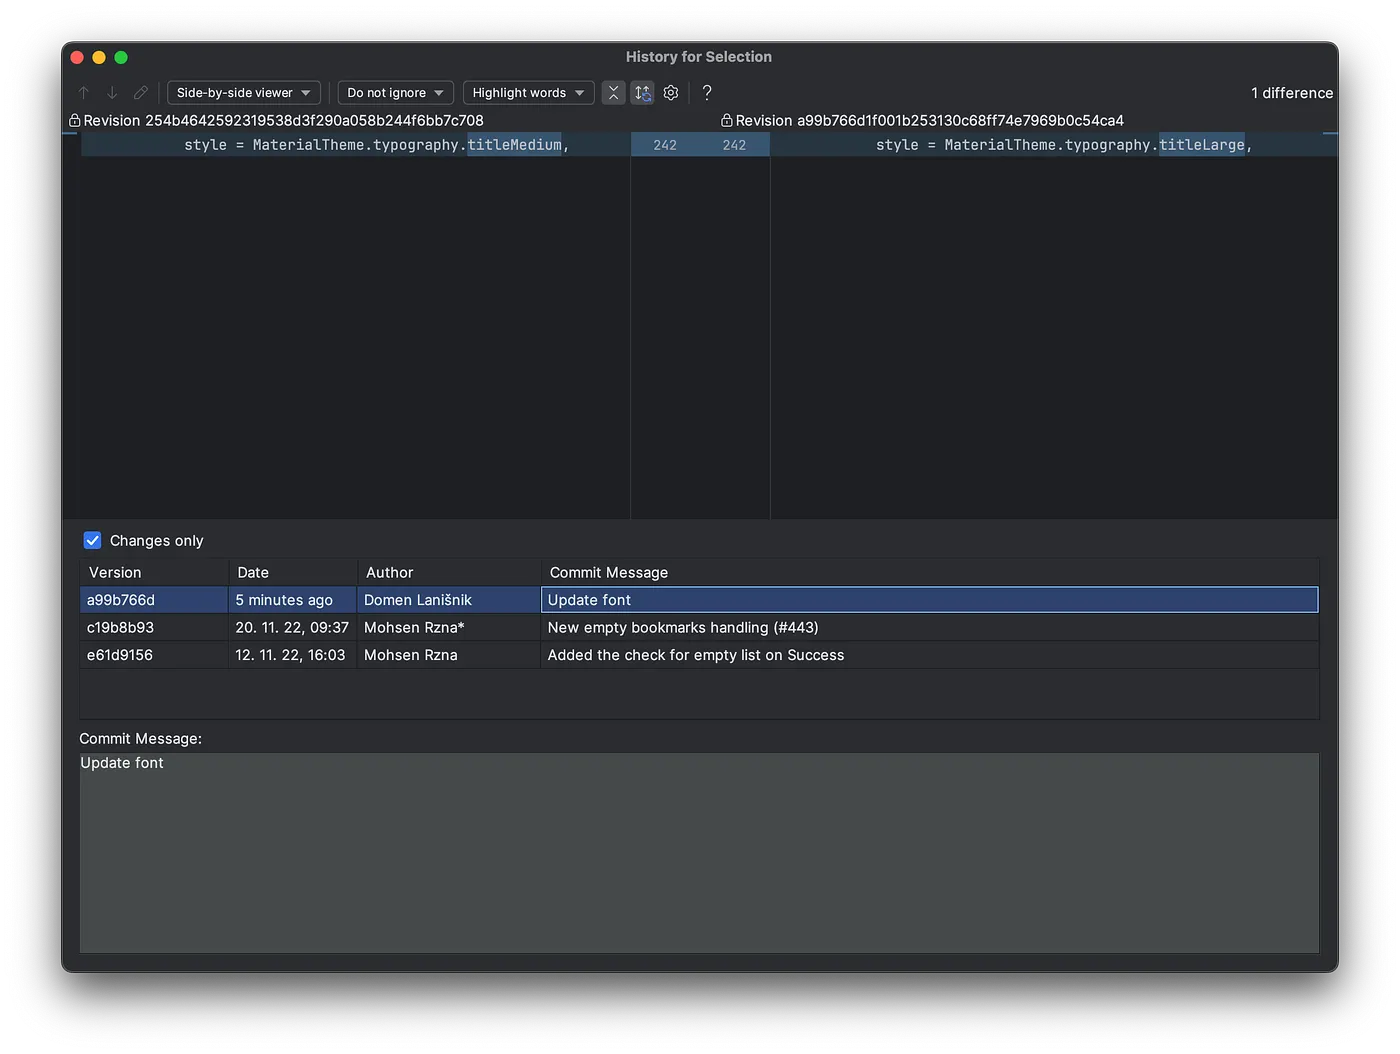 History for selection window.
View history for a file
To view the history for a specific file, right-click anywhere in the file, select Git, and “Show history”. A list of all commits that modified that file will be displayed.
 History for a file.
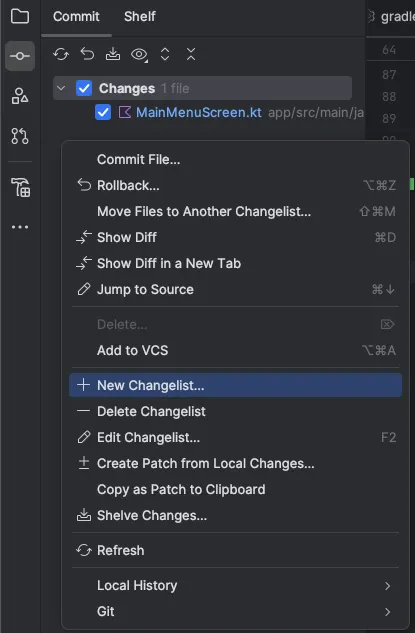
5. Multiple changelists
Android Studio supports creating multiple changelists in the commit window. This allows us to separate specific changes into multiple “folders”, which can be useful when we have changes that we don’t want to commit just yet, but need them to continue work.
To create a new changelist, we right-click in the commit window and select “New Changelist…”. This is also how we can edit or delete them.
 Creating a new changelist in the commit window.
We can then move files between changelists, organizing our commit window.
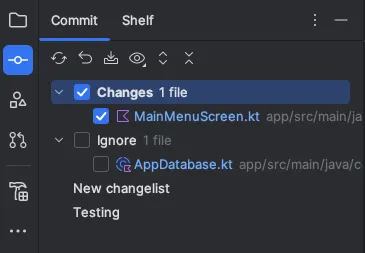 Multiple changelists inside the commit window.
Conclusion
We looked at a few useful features related to version control in Android Studio: shelving, patches, merge conflict resolution, annotations, and multiple changelists.
These are handy features that can make you more productive and speed up your workflow.
Let me know in the comments if there are other integrated features related to version control in Android Studio that you use regularly.
Resources: