7 Android Studio Usage Tips
7 Android Studio usage tips that can help boost productivity and make it easier to develop apps.
Android Studio is a powerful IDE that is simple to use. However, it also supports features that are not obvious but can help boost developer productivity and make it easier to develop apps.
Here are some Android Studio usage tips that you might find useful as well.
Some of the tips we cover also apply to IntelliJ IDEA, which is the IDE that Android Studio is based on.
1. Use Logcat to take screenshots and record the screen
Inside the Logcat window, you will find buttons to easily take a screenshot or record the screen of the currently connected and selected device.
Click on the camera button in the left-side menu of the Logcat window to take a screenshot. After a second or two you should see the captured screen. You can resize, crop, and rotate the image before saving it.
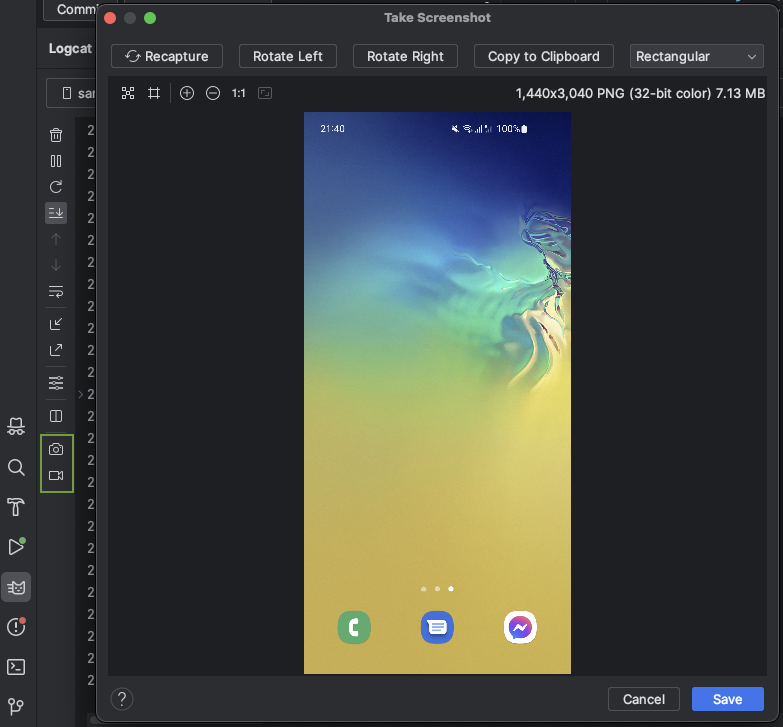 Screenshot capture window in Android Studio.
To record the screen, click the video camera button below the screenshot icon. You will be presented with an options dialog where you can select the bit rate and the resolution. There is no screen preview visible during recording. Once you stop the recording you will be asked for a location to store the recording on your computer.
 Screen Recorder Options dialog.
2. Learn and use keyboard shortcuts
Android Studio offers a keyboard shortcut for all the common actions you might need, ranging from navigation to refactoring to debugging. Learning to use your keyboard instead of a mouse might seem daunting, but it will help you be more productive in the long run.
Instead of trying to memorize all the shortcuts, you can install an IDE plugin called Key Promoter X to help you out. When you use the mouse on a button inside the IDE, this plugin shows you the keyboard shortcut you should have used instead. And if there is no shortcut for a frequent action, it will suggest to create one.
 Notification from Key Promoter X
To install the plugin go to Settings -> Plugins, search for Key Promoter X on the marketplace, and click Install.
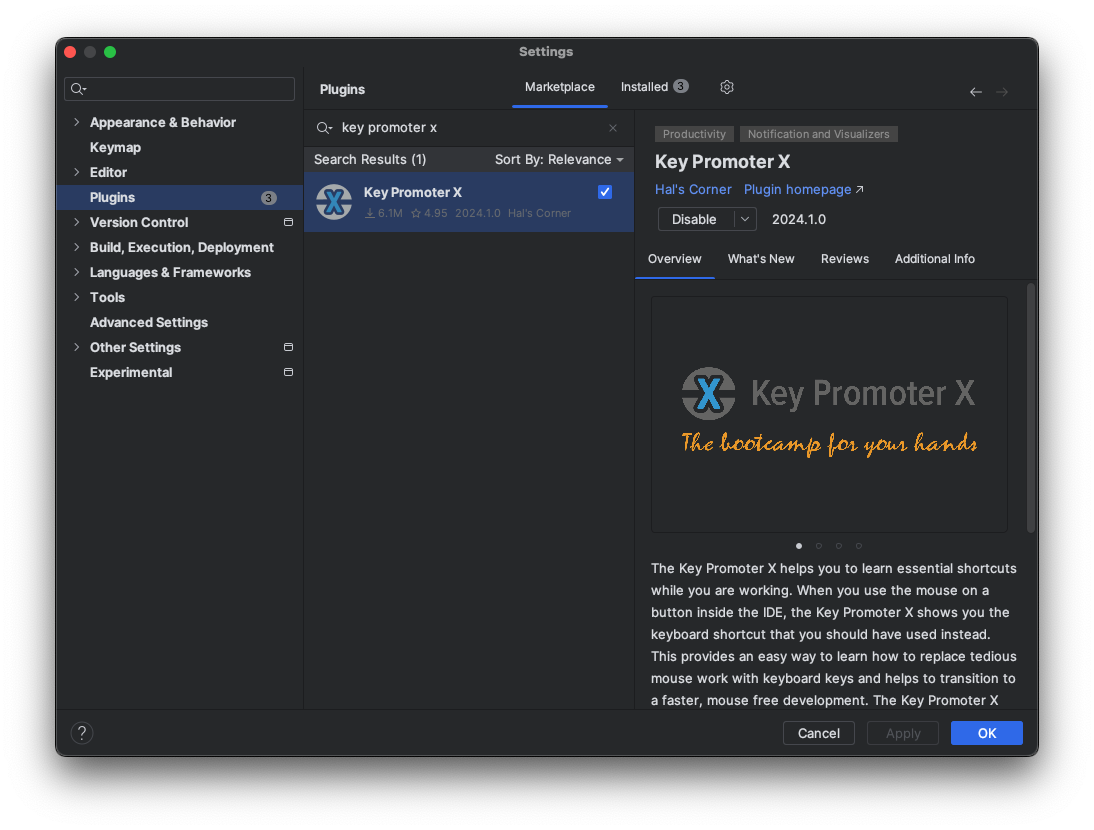 Install the Key Promoter X plugin from the plugins marketplace.
3. Disable run window switching
Recent versions of Android Studio will auto-switch from Logcat to Run window after the app has been deployed. This can be annoying as you have to switch the tab manually even if you switched it a few seconds before the app was run.
You can disable this behavior by going to Run -> Edit Configurations then scroll to the bottom of the General tab and make sure that Activate tool window is unchecked.
Note that this needs to be done for each project manually.
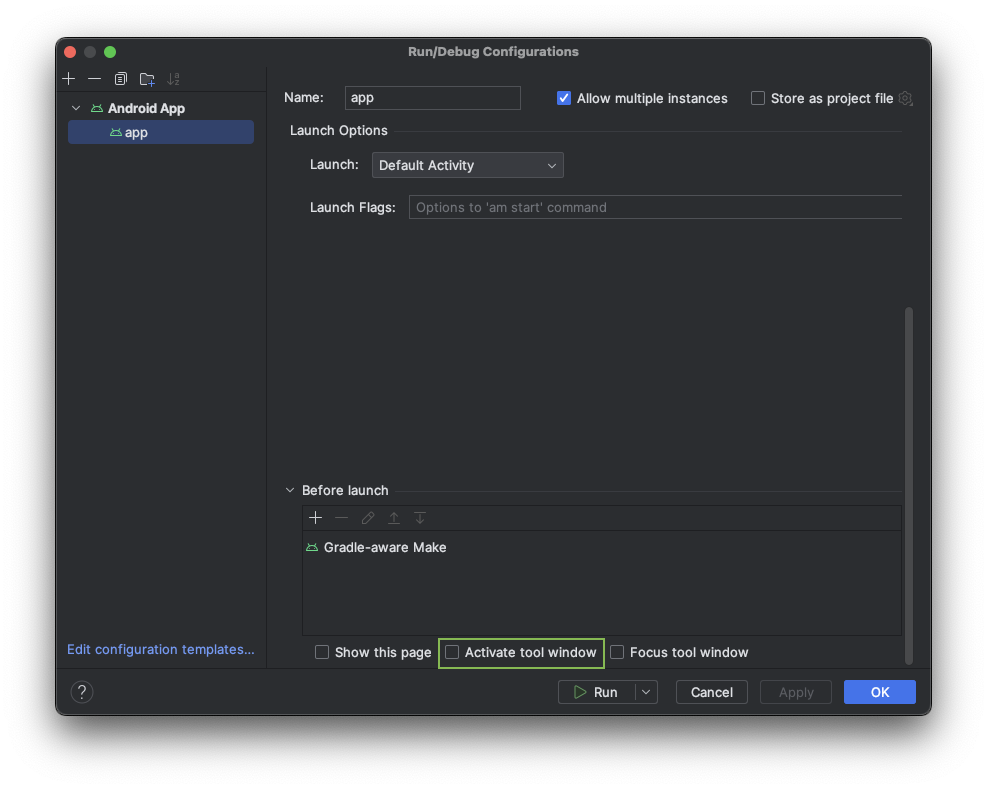 Disabling window switching in the Run Configurations window.
4. Automatically show Logcat on each app run
Related to the previous setting, you can turn on an option that will automatically open the Logcat tab when you deploy the app. Additionally, you can set it to clear the logs as well.
Note that this will open Logcat even if you currently have the whole bottom window closed or some other tab selected.
This needs to be done for each project by going to Run -> Edit Configurations and selecting the Miscellaneous tab. Then you can enable the “Show logcat automatically” and “Clear log before launch” options.
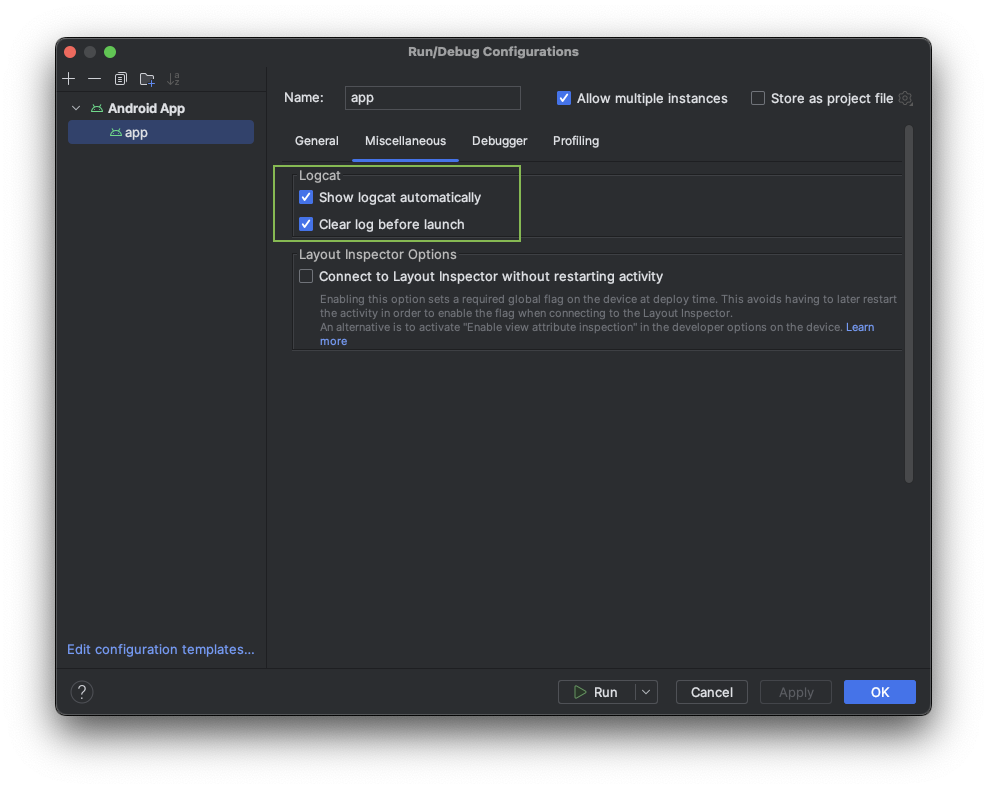 Logcat settings in the Run Configurations window.
5. Use the built-in Git client
Android Studio comes with an integrated Git GUI client that is rich in features. If you use a third-party standalone GUI client like GitHub Desktop or SourceTree you can simplify your workflow by using the built-in one. If you are a console user you probably prefer to run git commands yourself, but might still find this useful.
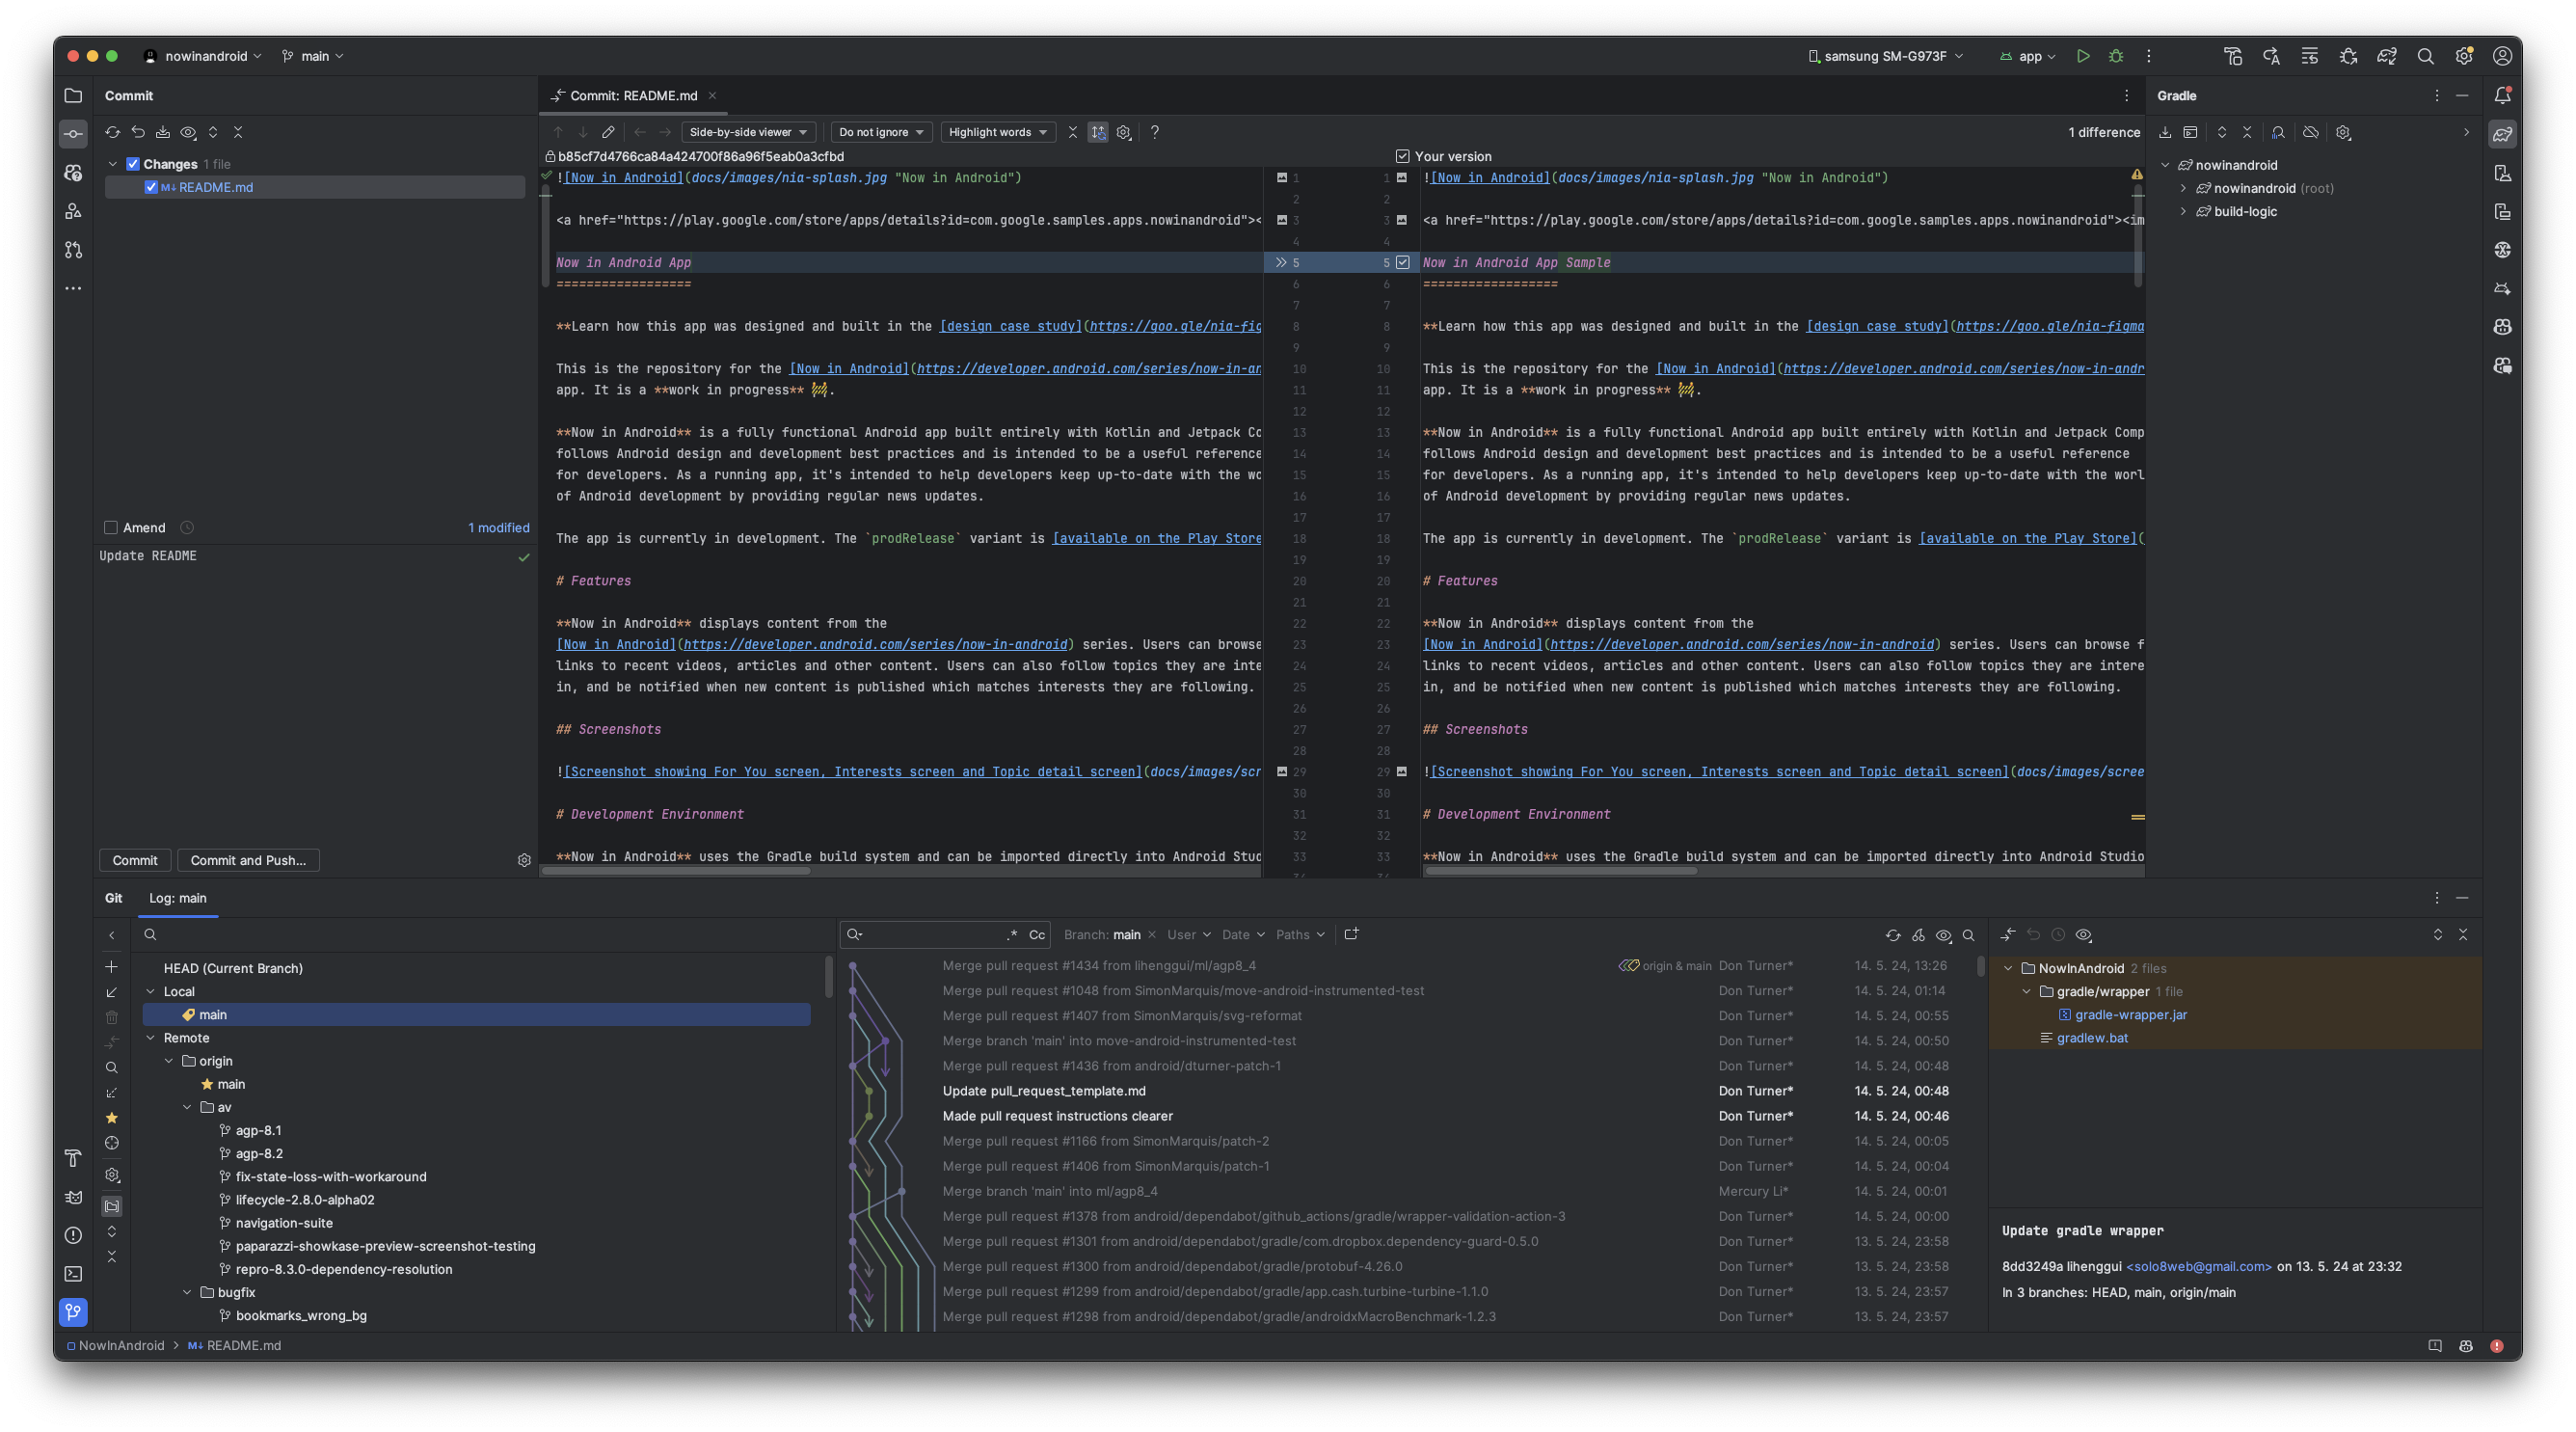 Built-in Git client in Android Studio
Besides the basic features like fetch, pull, push, and creating a new branch, Android Studio also supports more advanced use cases like force-push, rebase, cherry-pick, and others.
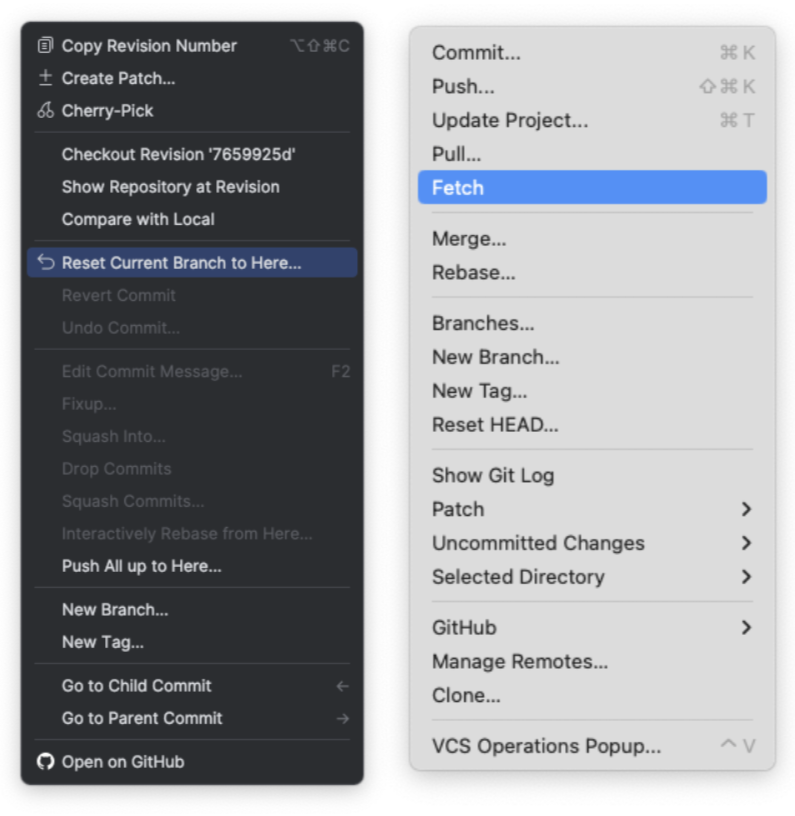 Various available git commands in Android Studio.
Merge conflict resolution
It also offers a great interactive merge conflict resolution tool that displays the changes from both branches and the final result in the middle. It also supports manual editing.
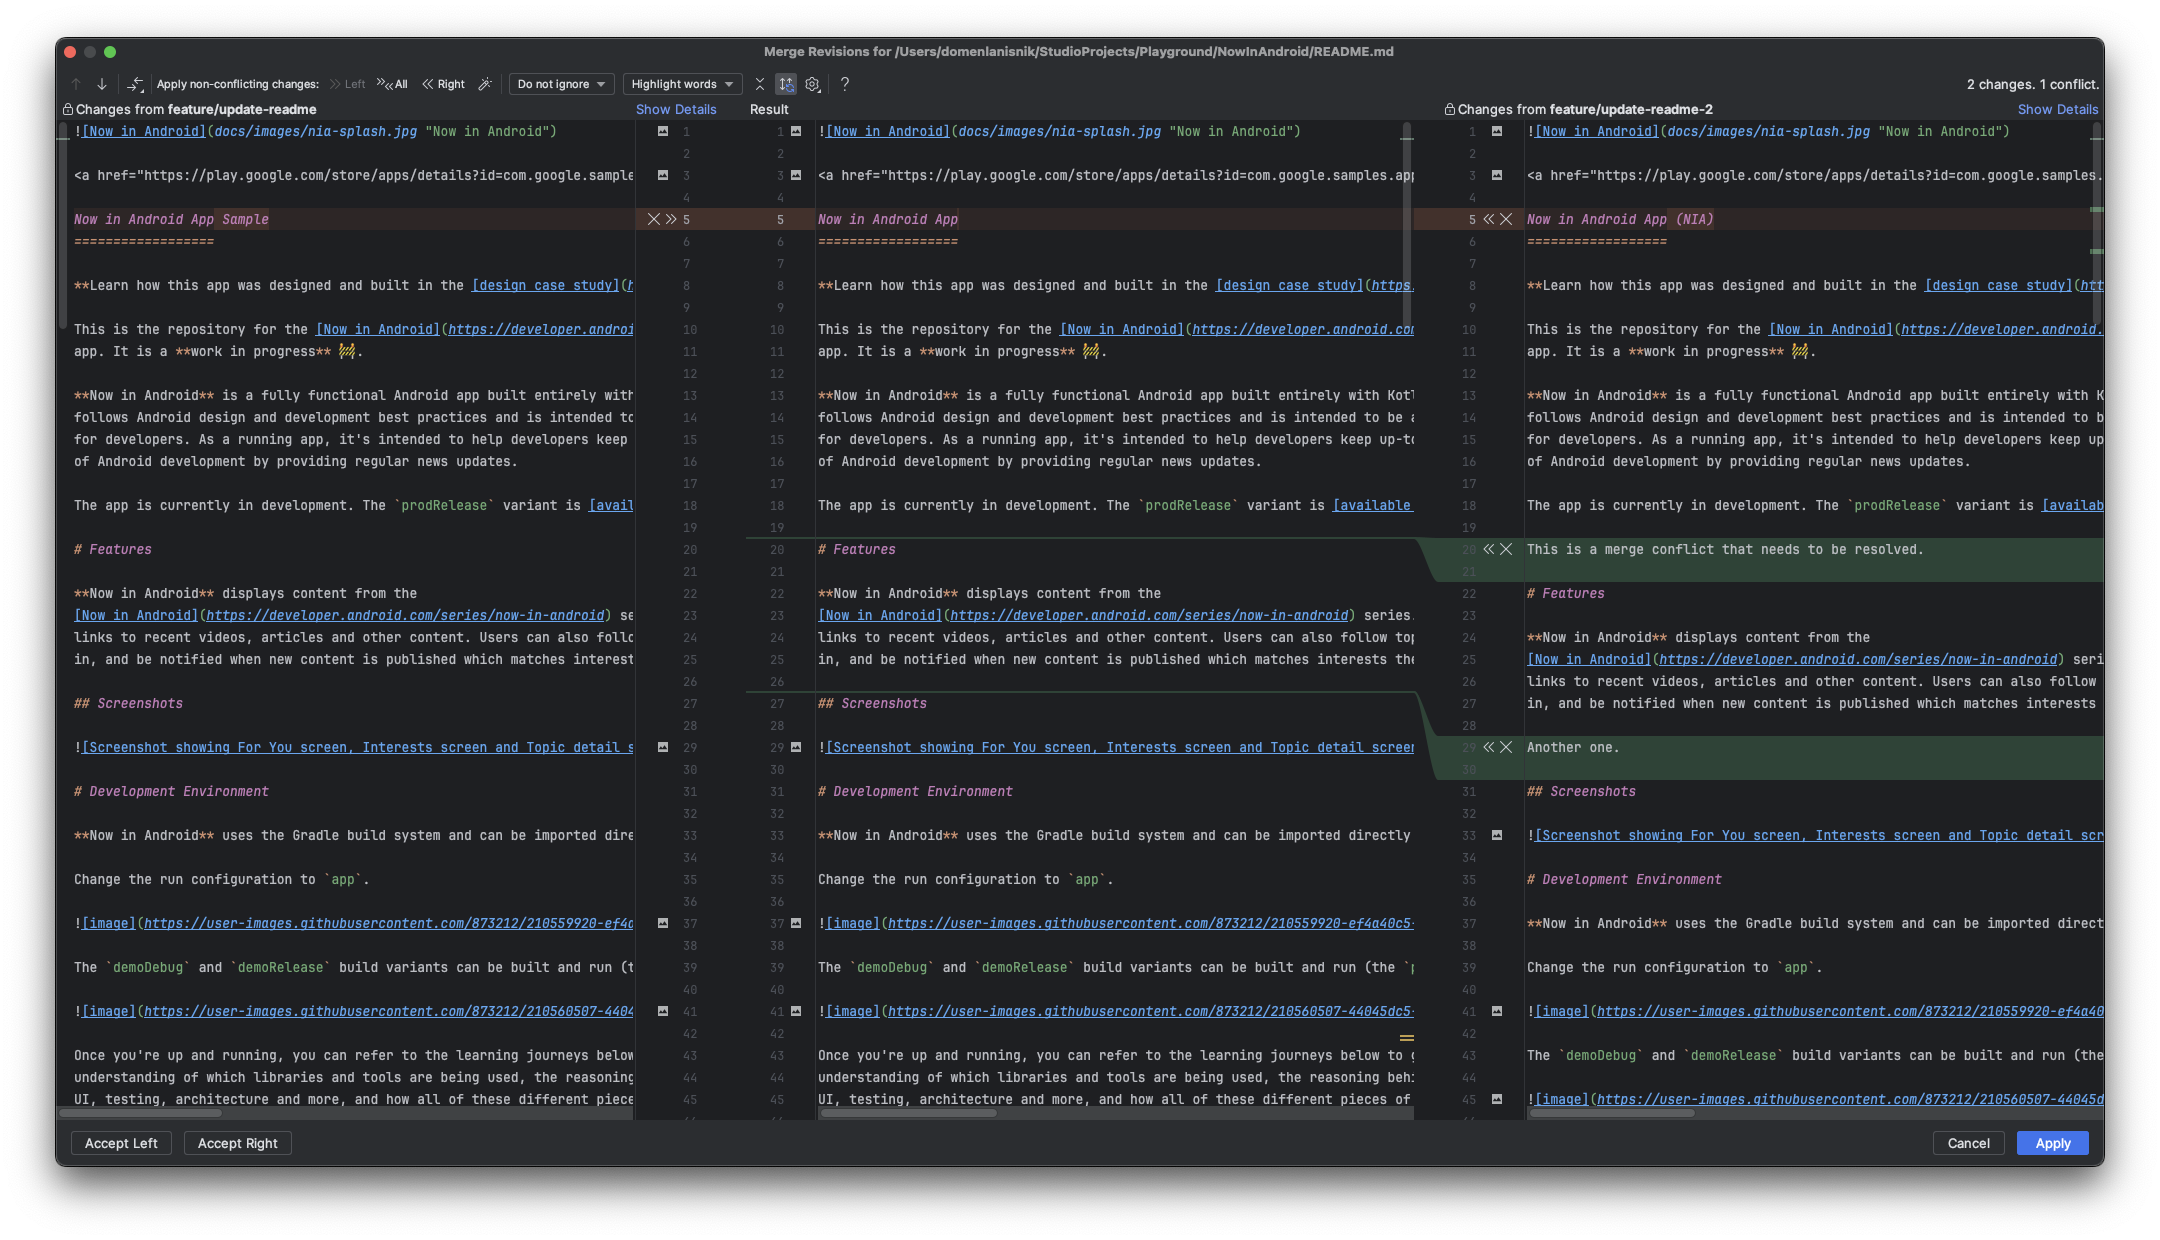 Merge conflict resolution window in Android Studio.
Shelving changes
Additionally, Android Studio supports shelving or stashing changes. This means that you can store your pending changes you have not committed yet and then restore them when needed. This is useful, for example, if you need to switch to another task, and want to set your changes aside to work on them later.
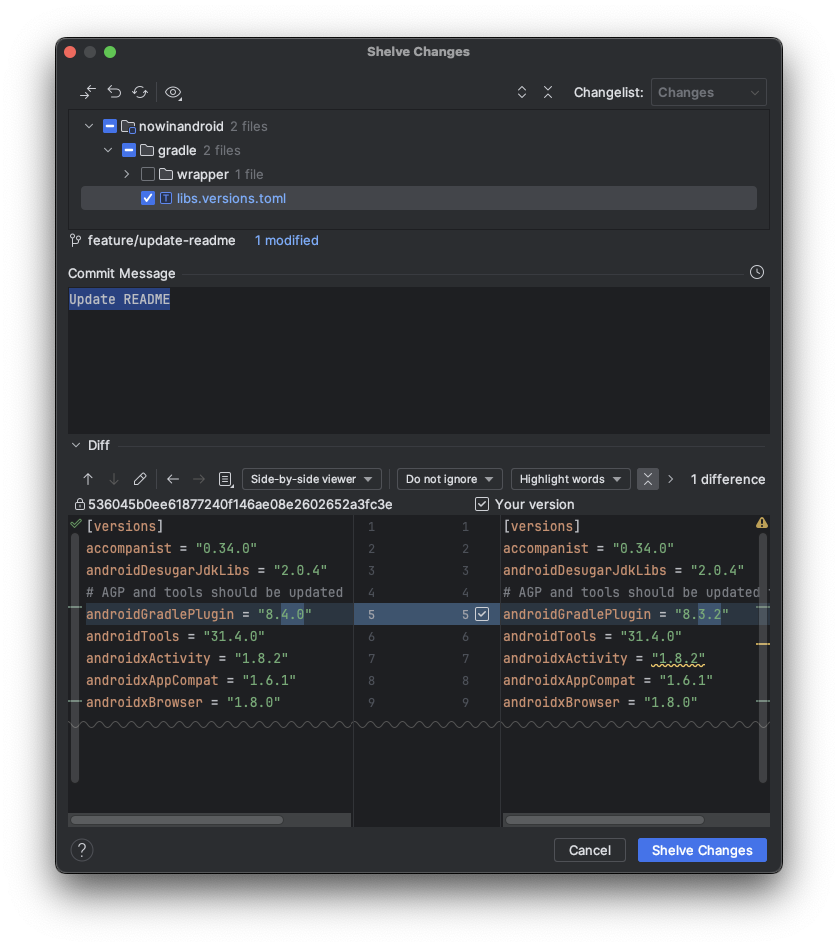 Shelve Changes window in Android Studio.
Android Studio supports many other git functions that you can learn more about in this talk from Droidcon Italy: https://www.youtube.com/watch?v=XMUnUotuvGw.
6. Install the ADB Idea plugin
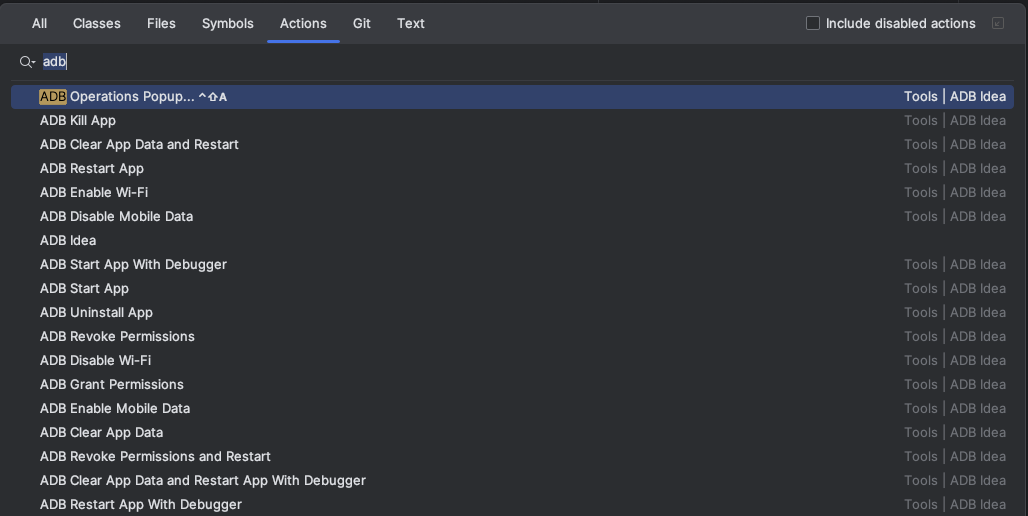
Android Studio has vast support for third-party plugins that add useful features. One such is the ADB Idea plugin which provides a quick way to execute common manual operations.
Instead of clearing app data or revoking permission by clicking through different menus in the device settings, you can do it with one button press directly from Android Studio.
To install the plugin go to Settings -> Plugins, search for ADB Idea on the marketplace, and click Install.
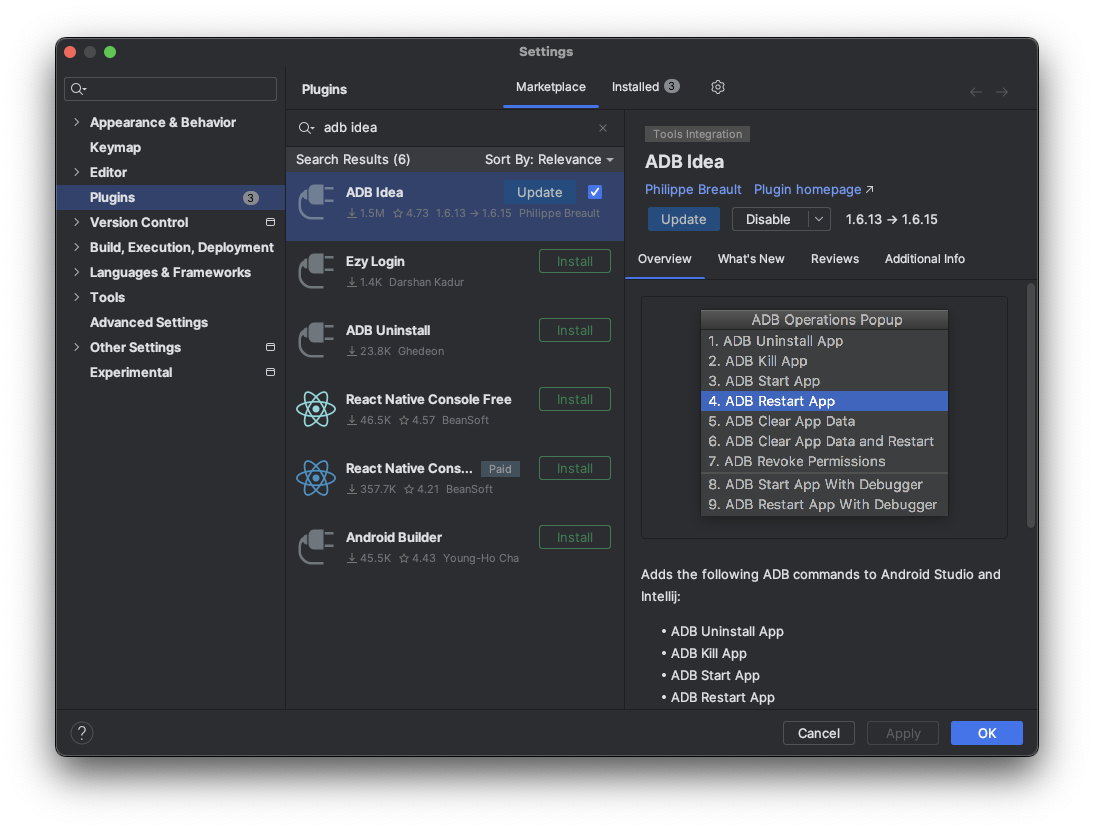 Install the ADB Idea plugin from the plugins marketplace.
7. Learn the debugger
Android Studio debugger is a powerful tool with a lot of features. Using it efficiently can help make debugging more productive and successful.
Attach a debugger instead of re-launching your app
There are two ways to start debugging. One is launching the app by clicking the green bug button next to the run button. This will launch or restart your app if it’s already running and can take a bit longer.
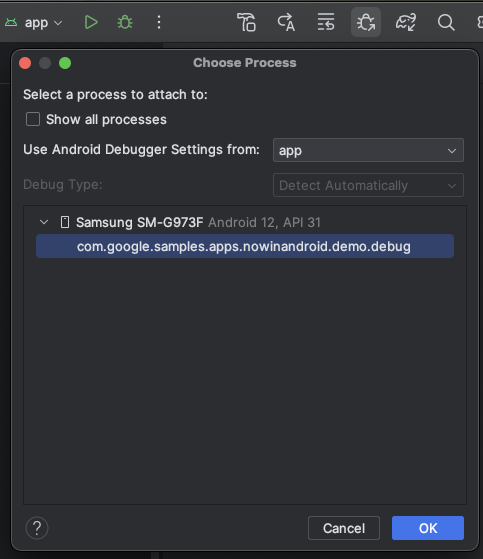
A faster way is to attach a debugger to an already running application by clicking the bug button with an arrow in the toolbar. This will open a new window where you can select your process. Once you see a checkmark inside your breakpoints you can start debugging.
Use keyboard shortcuts
All the execution buttons like step into and step over have their own keyboard shortcuts that make debugging faster. You can use Key Promoter X to learn them easily.
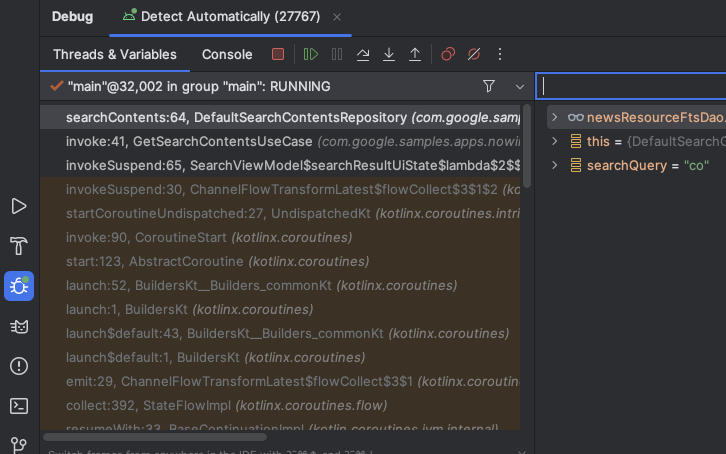 Debug window in Android Studio.
Conditional breakpoints
You can set up a conditional breakpoint which will only be triggered when the condition you specify is evaluated to be true. This can help speed up debugging as the breakpoint won’t be hit for cases you are not interested in.
One way to create a conditional breakpoint is to first set a regular breakpoint by clicking on the line number. Then right-click on the breakpoint to open a popup and write your condition.
For example, the breakpoint in the image below will only get triggered when the parameter newsResourceId equals google.
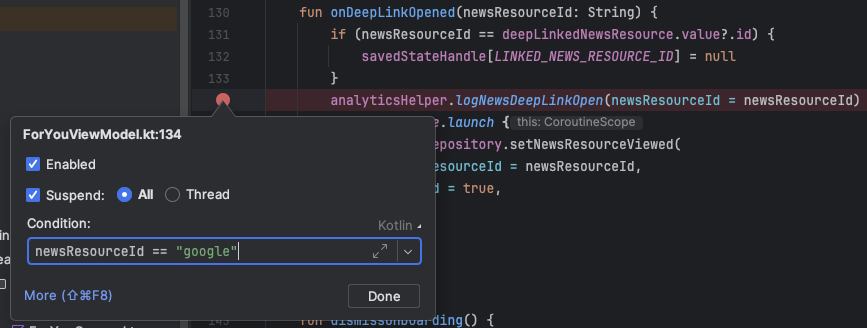 Creating a conditional breakpoint.
Another way to create a conditional breakpoint is to open the breakpoints window in the debug window. You can then select an existing breakpoint and add a condition.
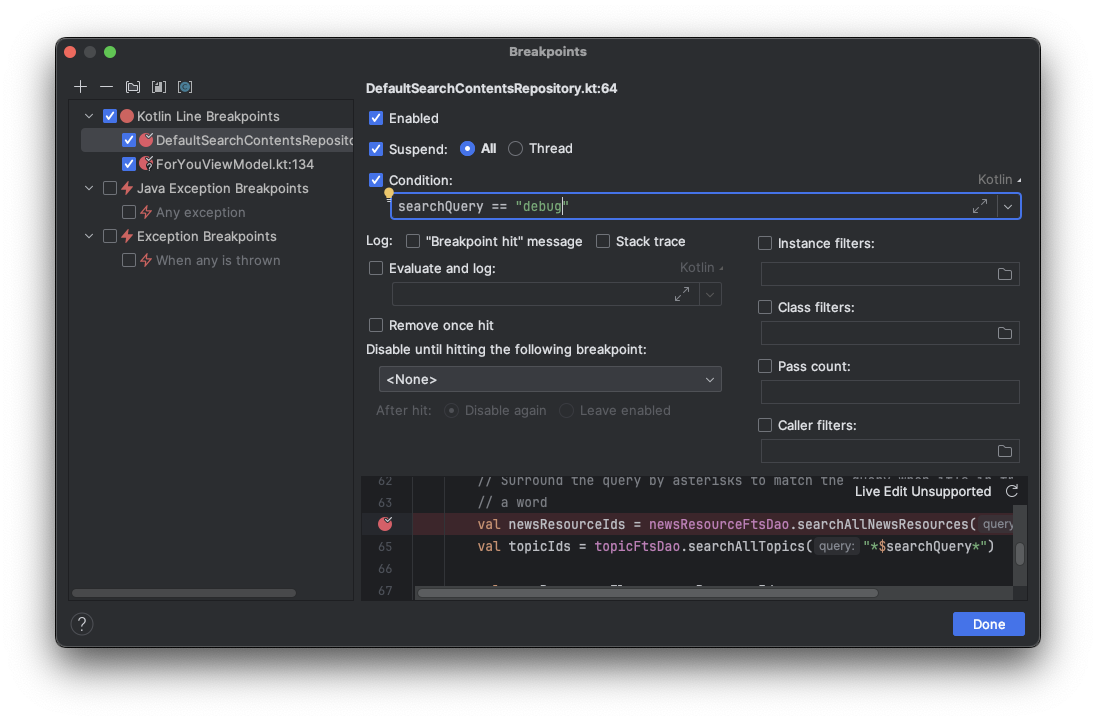 Creating a conditional breakpoint.
Evaluate conditions
You can see the value of a certain variable, parameter, or expression at runtime when using the debugger. Function parameters will usually have their value written next to them. Other expressions you can evaluate by:
- selecting the expression and clicking “Add to watches”
- selecting the expression and dragging and dropping it into the debugger window
- writing the expression manually in the expression input
The last option also enables viewing additional properties of a variable instead of just the value.
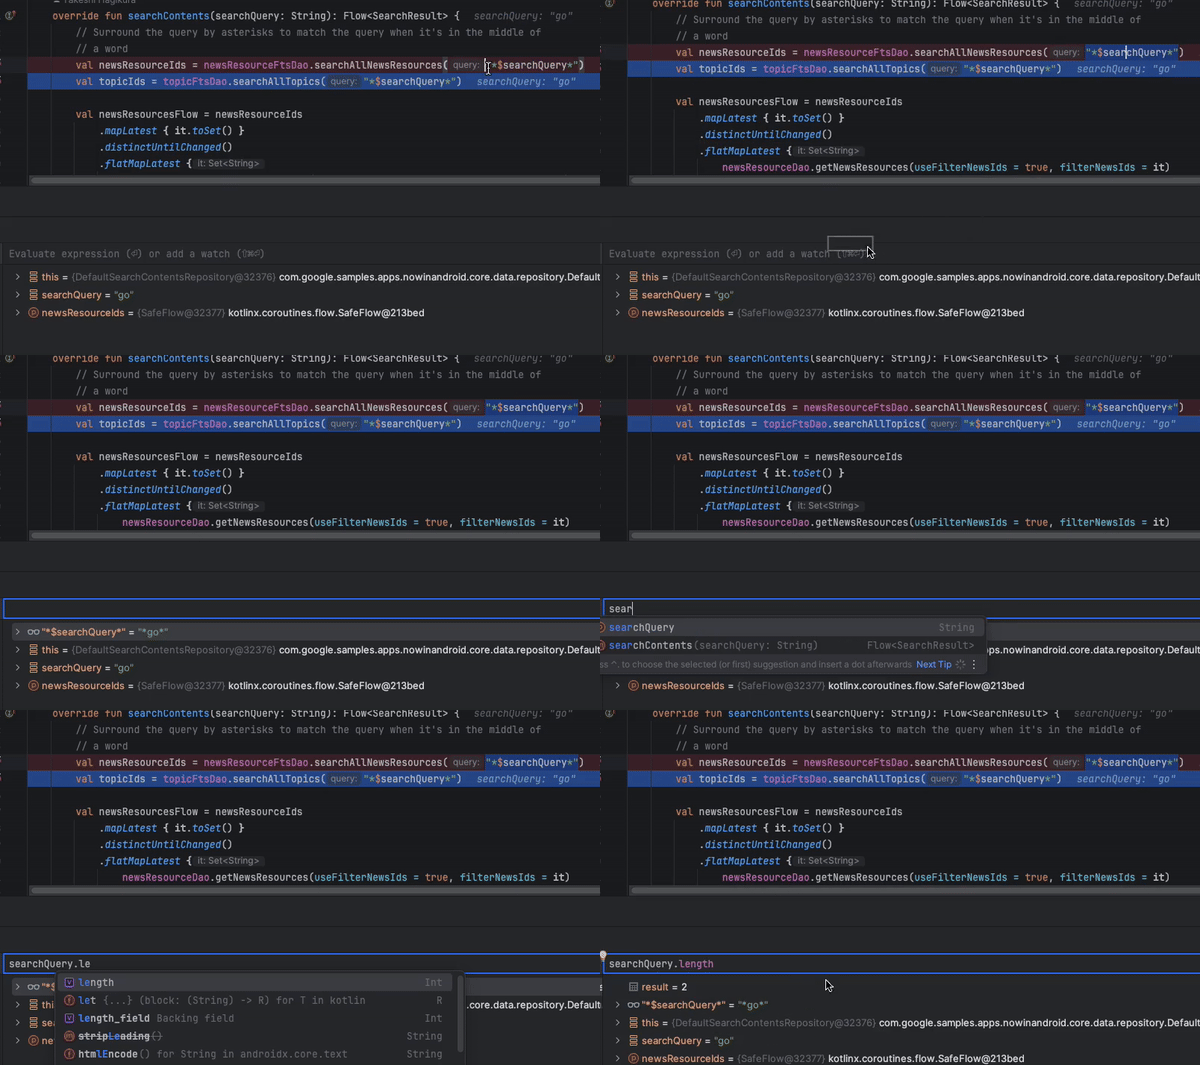 Using the debugger to evaluate a condition.
You can read more about the debugger’s features in the official documentation.
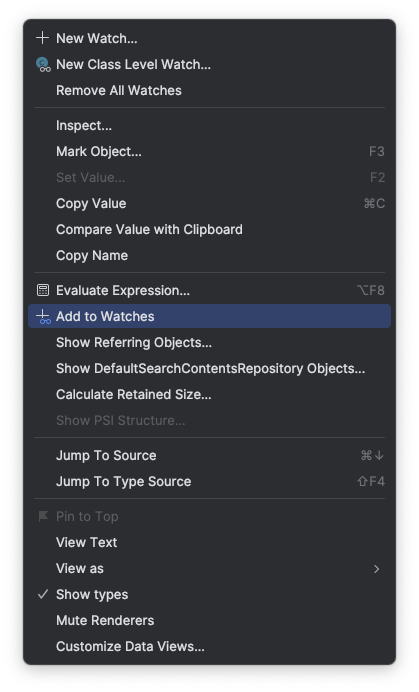 Using the debugger to evaluate a condition.
Conclusion
Android Studio has many features that are not obvious but can help us be more productive and simplify development. In this article, we’ve covered a few tips on how to get the most out of Android Studio. I hope you found them useful and will incorporate them into your daily development routine.
There are many other useful features of Android Studio. Let me know your favorite Android Studio productivity tips in the comments.
And if you prefer learning through talks, here is a great talk on how to become more efficient in Android Studio from Droidcon Berlin

